Video walkthrough
Prerequisites:
- An active Agent 37 account
- A running OpenClaw instance in Agent 37
- An Anthropic Console account
- A valid Claude API key
Step 1: Create your Claude API key
- Go to the Anthropic Console and sign in.
- In the left sidebar, open Manage > API Keys.
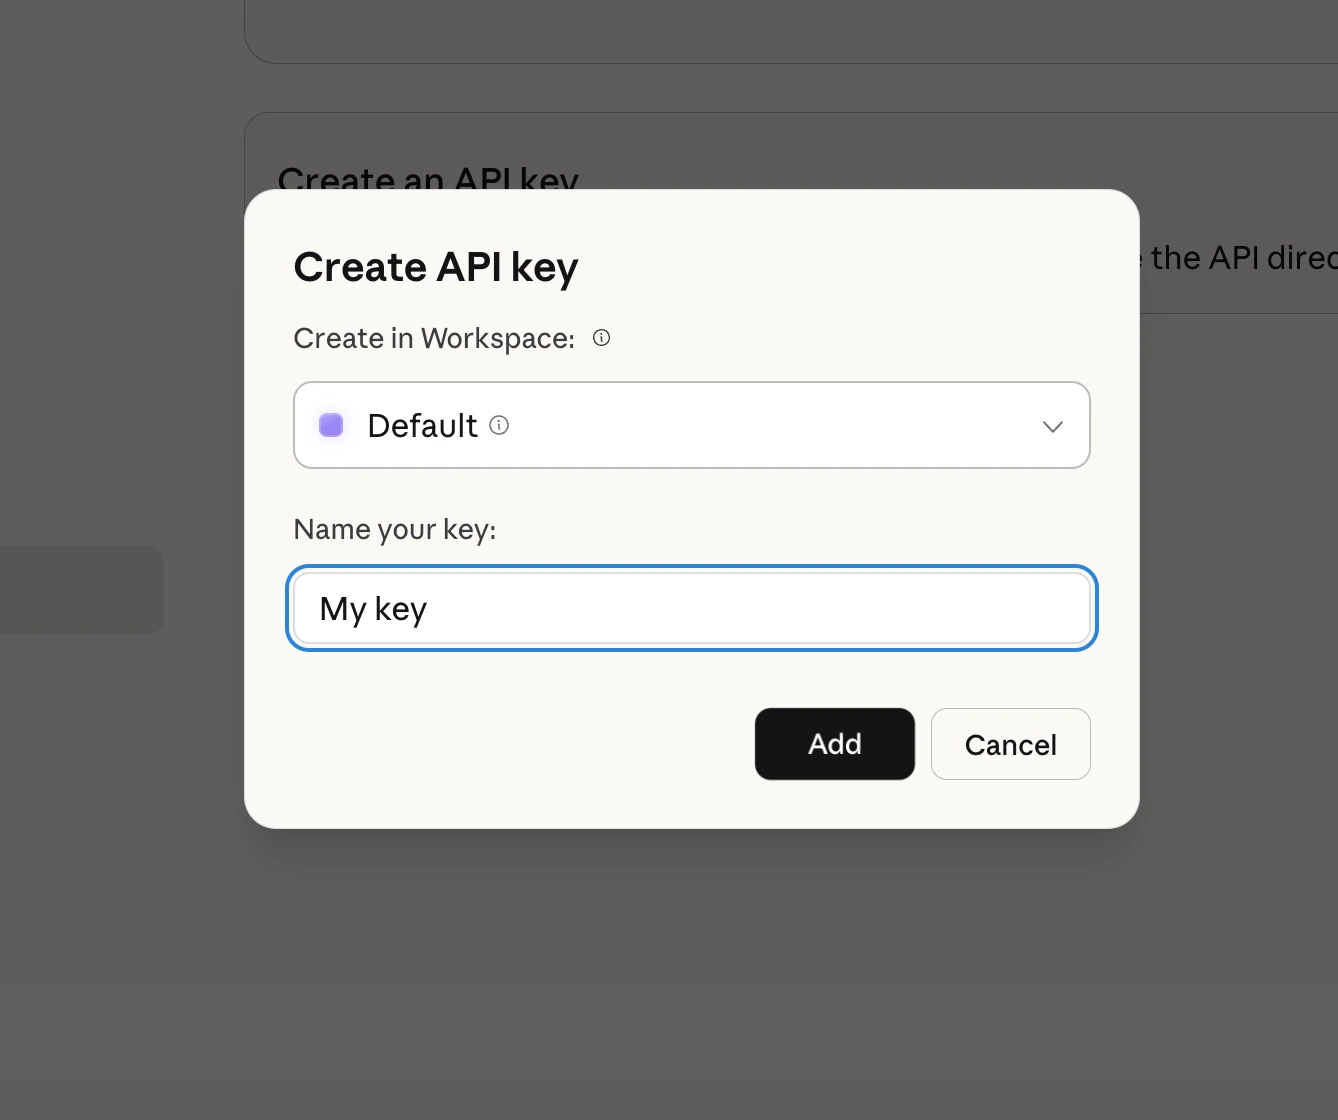
- Click Create Key.
- When prompted:
- Select the workspace
- Enter a name for the key
- Click Add
- Copy the generated key.

Step 2: Open your Agent 37 instance
- Go to the Agent 37 dashboard and sign in.
- Open an existing instance, or create a new one.
- Open Terminal.
Step 3: Configure OpenClaw to use Anthropic
In Terminal, run:- Where will the gateway run? →
Local
- Select Section to Configure? →
Mode
- Model / Auth Provider →
Anthropic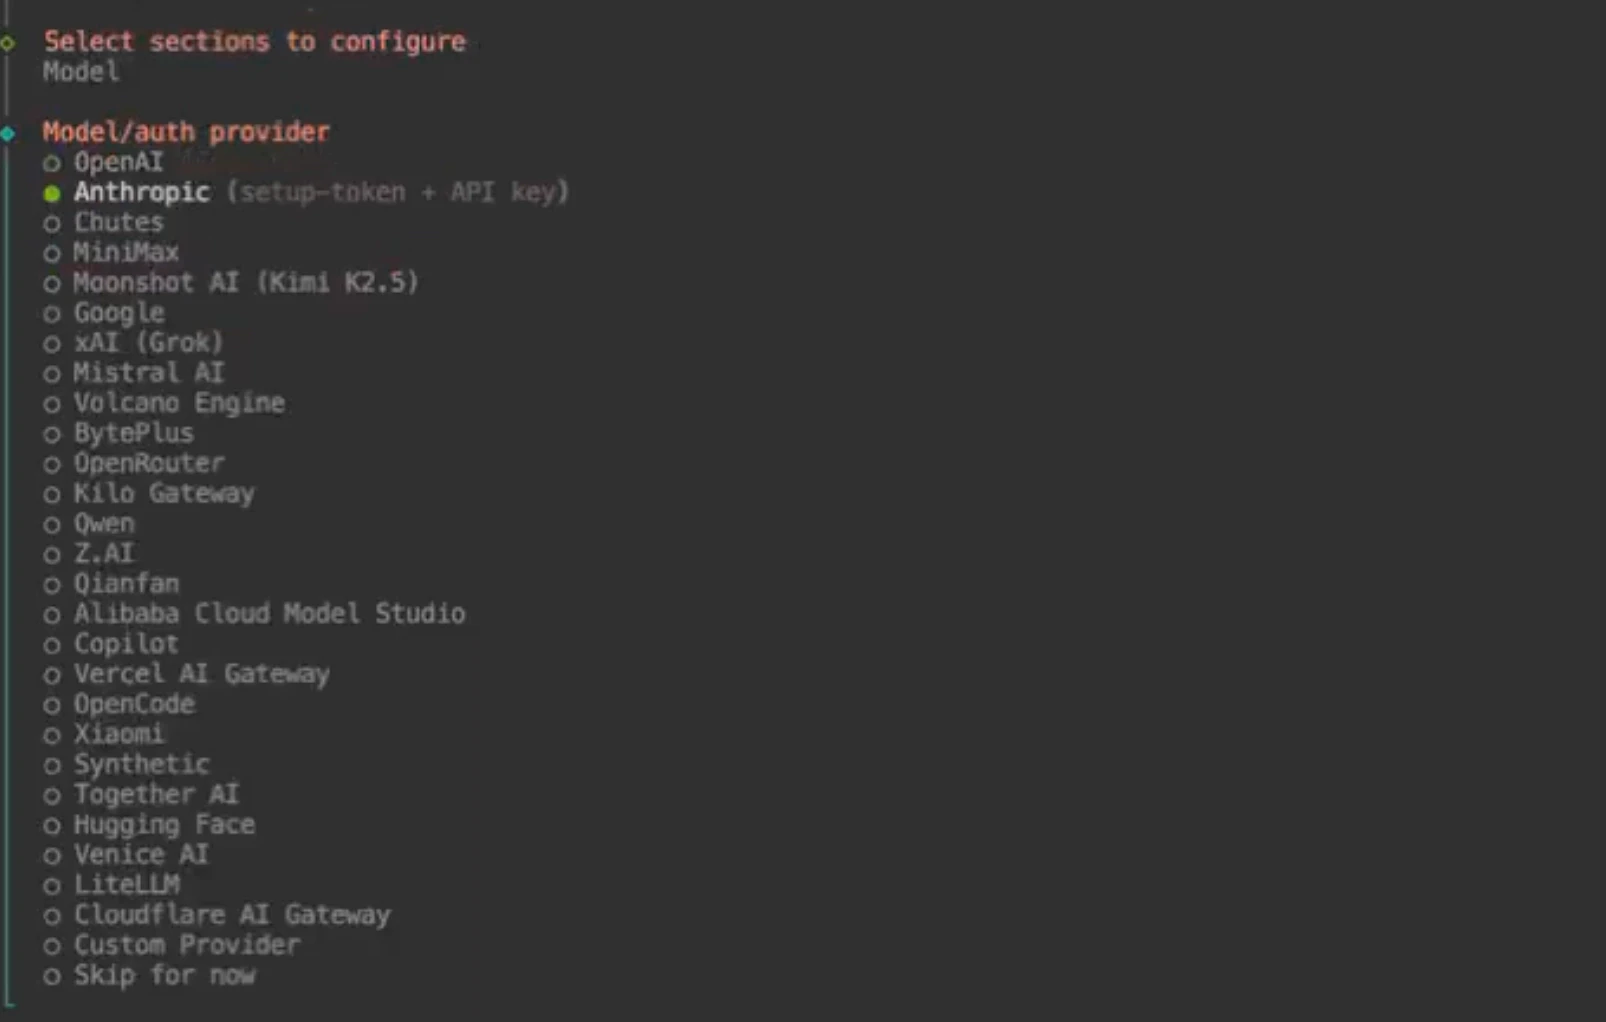
- Anthropic Auth Model →
Anthropic API Key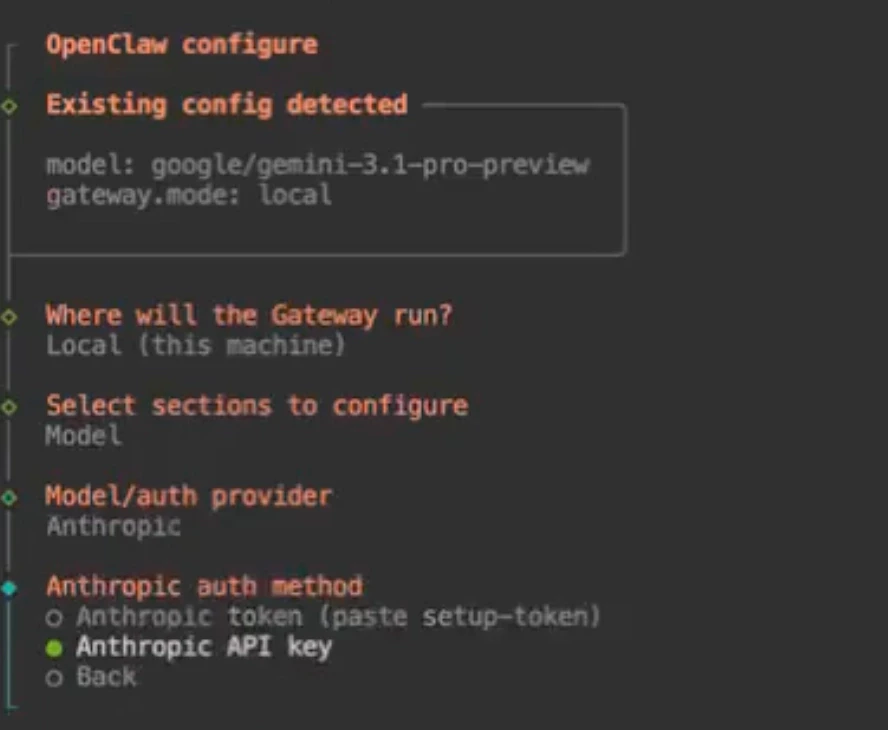
- How do you want to provide this API key now? →
Paste API key now
- Enter Anthropic API key → paste the key you copied in Step 1

- Models in /models picker → choose the model you want to use, for example
anthropic/claude-sonnet-4-6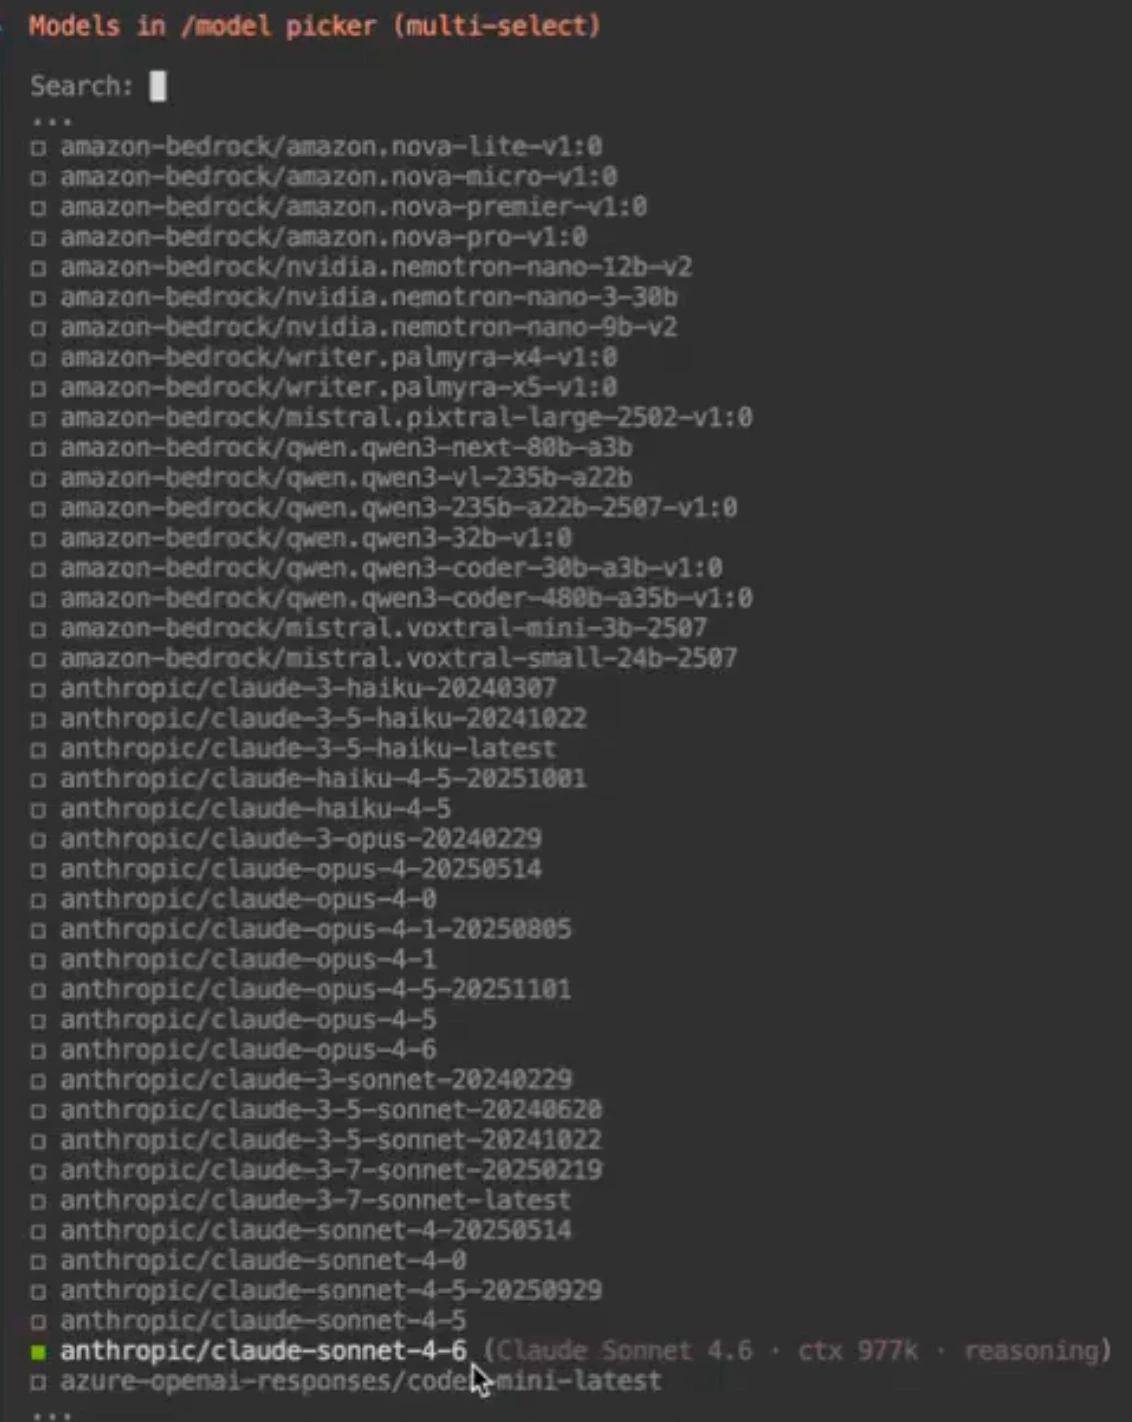
- After selecting the model, choose
Continue

Step 4: Verify the configured model
Run:
What to do next
Once Claude is configured, you can:- connect a channel like WhatsApp or Telegram
- test your bot in Web Chat
- continue tuning prompts and provider settings
Documentation home
Browse the available channels, models, and networking guides.
OpenAI API
Compare the OpenAI setup flow with the Claude configuration flow.