Video walkthrough
Step 1: Access the Agent37 dashboard
Start by visiting the Agent37 dashboard: 🔗 https://www.agent37.com/dashboard Log in to your account. If you don’t have one yet, create an account to get started.Step 2: Create a new instance
Once logged in:- Navigate to your dashboard.
- Click on Create Instance.
- Wait for the instance to be successfully created.
Step 3: Open the terminal
After your instance is ready:- Click on your newly created instance.
- Select Terminal from the available options.
Step 4: Run the configuration command
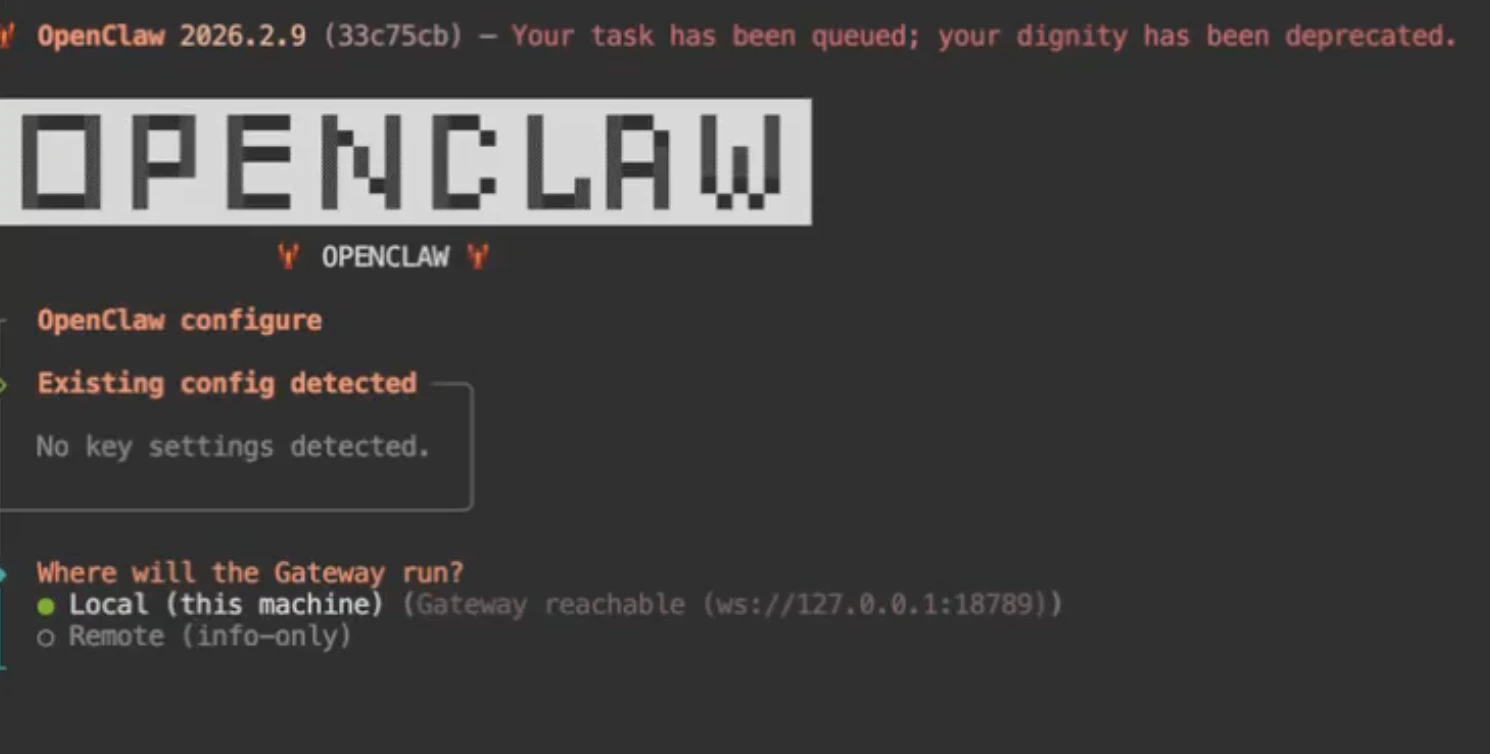
Inside the terminal, execute the following command:Step 5: Configure the gateway
When prompted:- Where will the gateway run?
Local
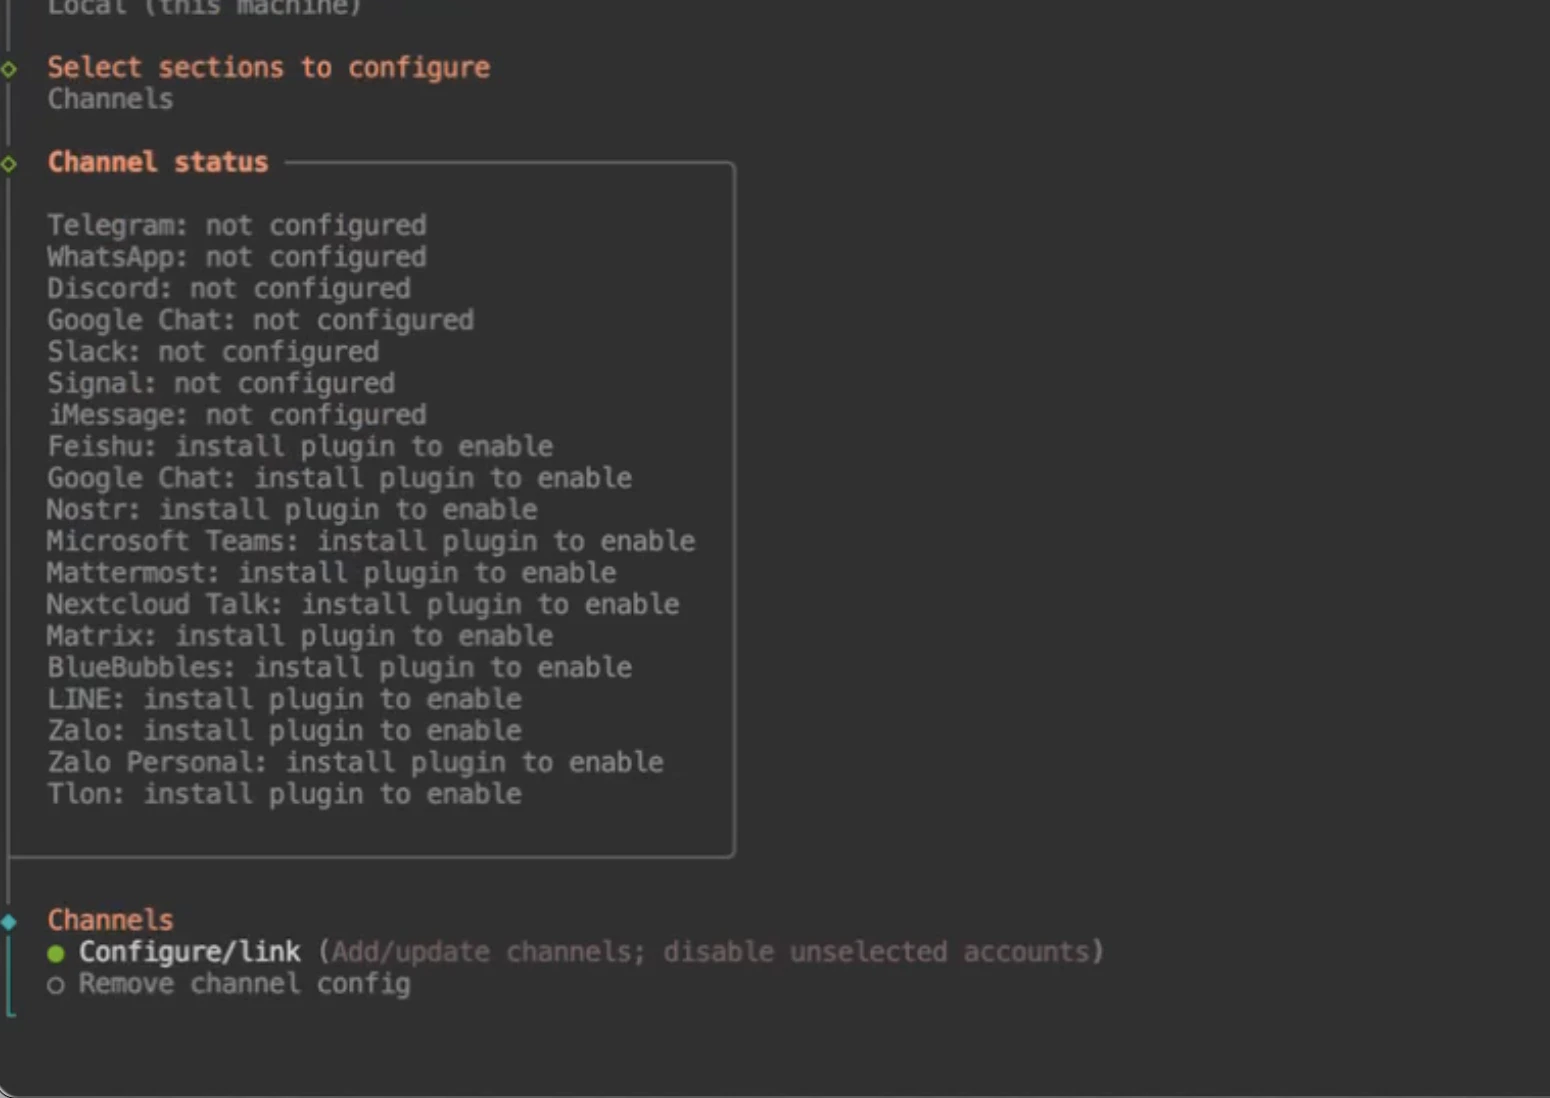
- Select Section to Configure?
Channel
👉 Choose Configure / Link
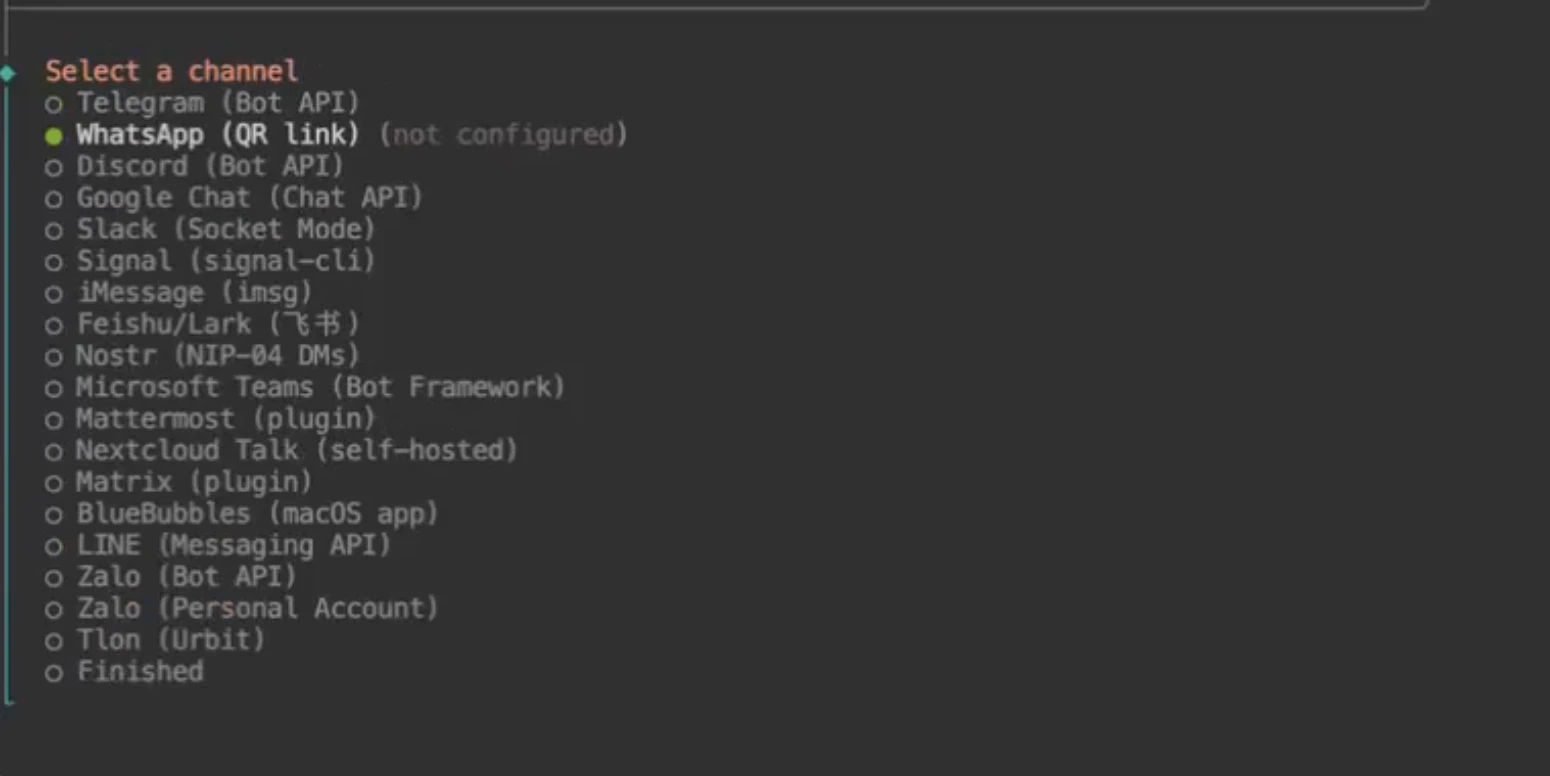
Use the arrow keys on your keyboard

- Select Channel
WhatsApp
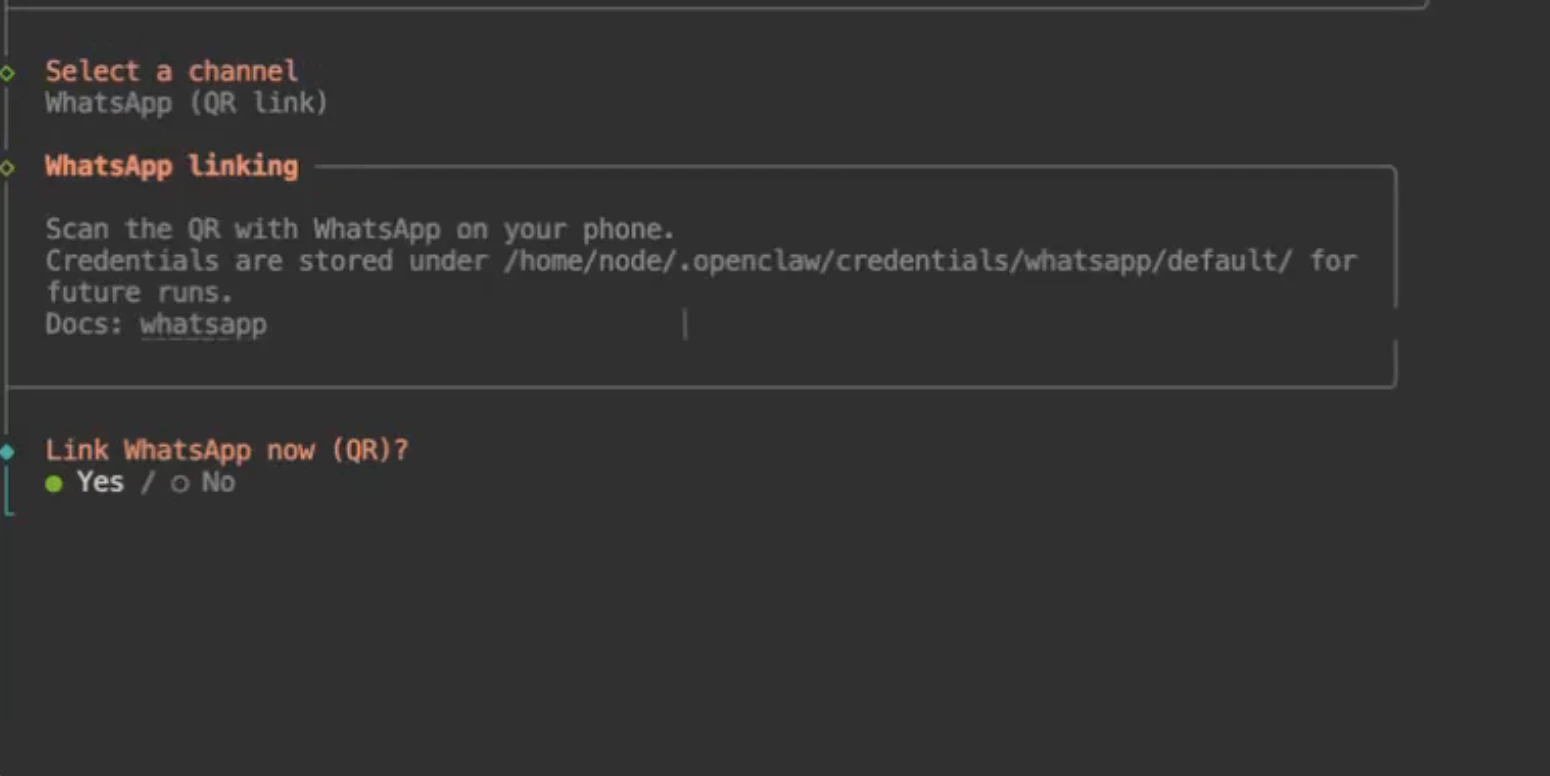
- Link WhatsApp Now?
👉 Select Yes
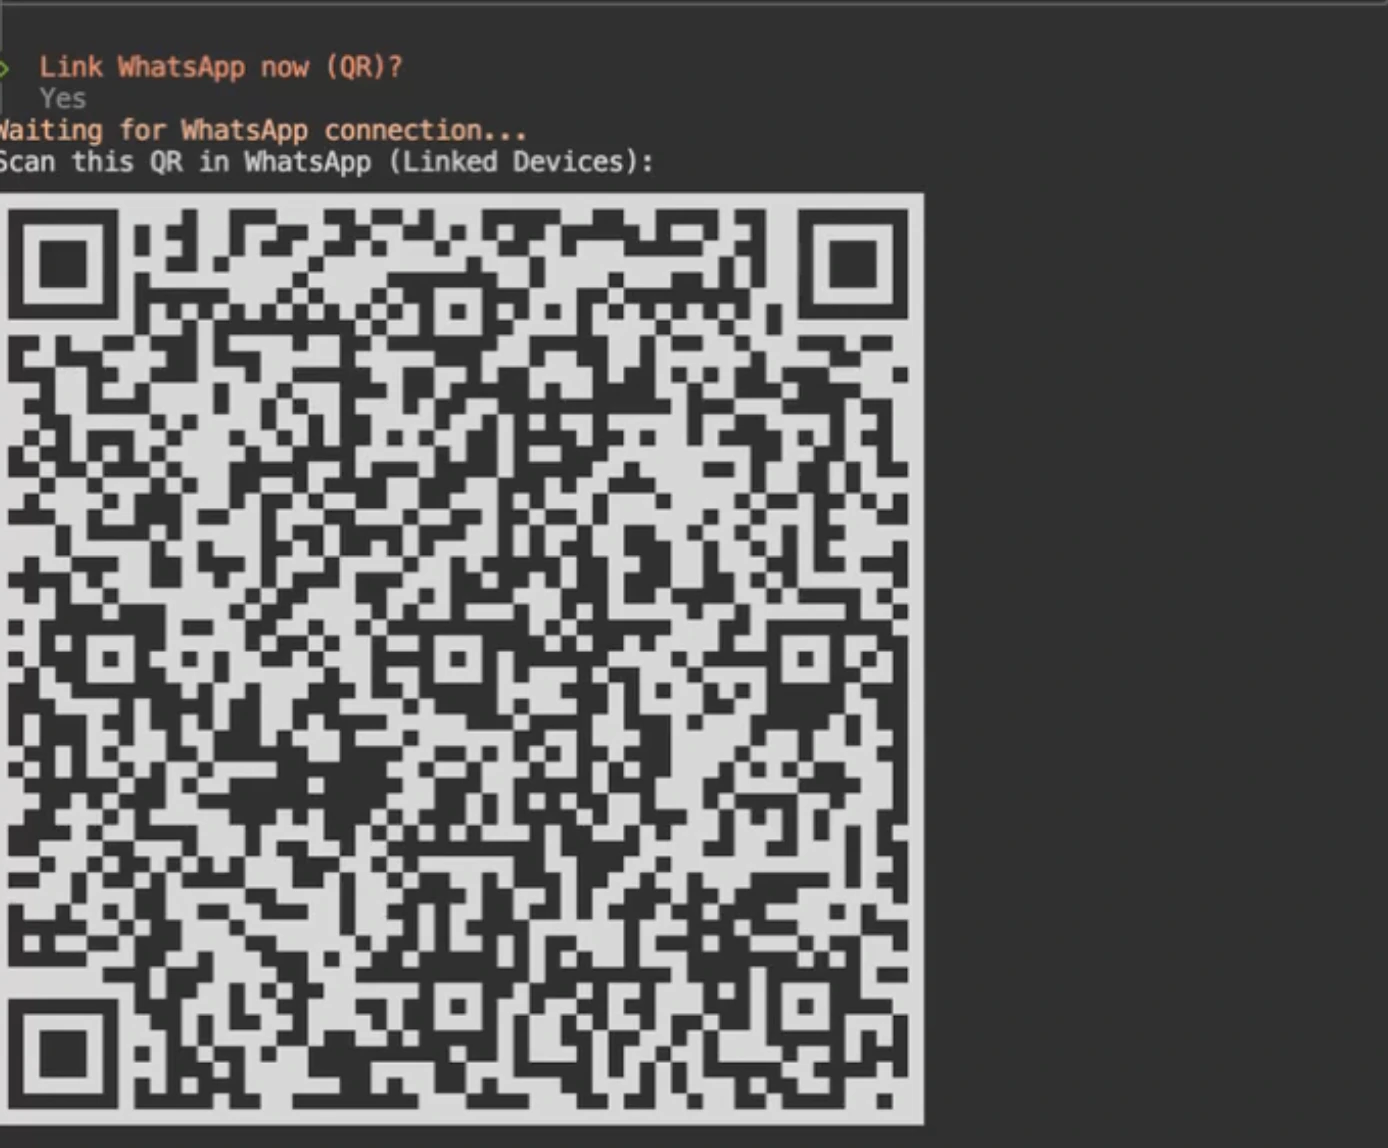
Step 6: Scan the QR code
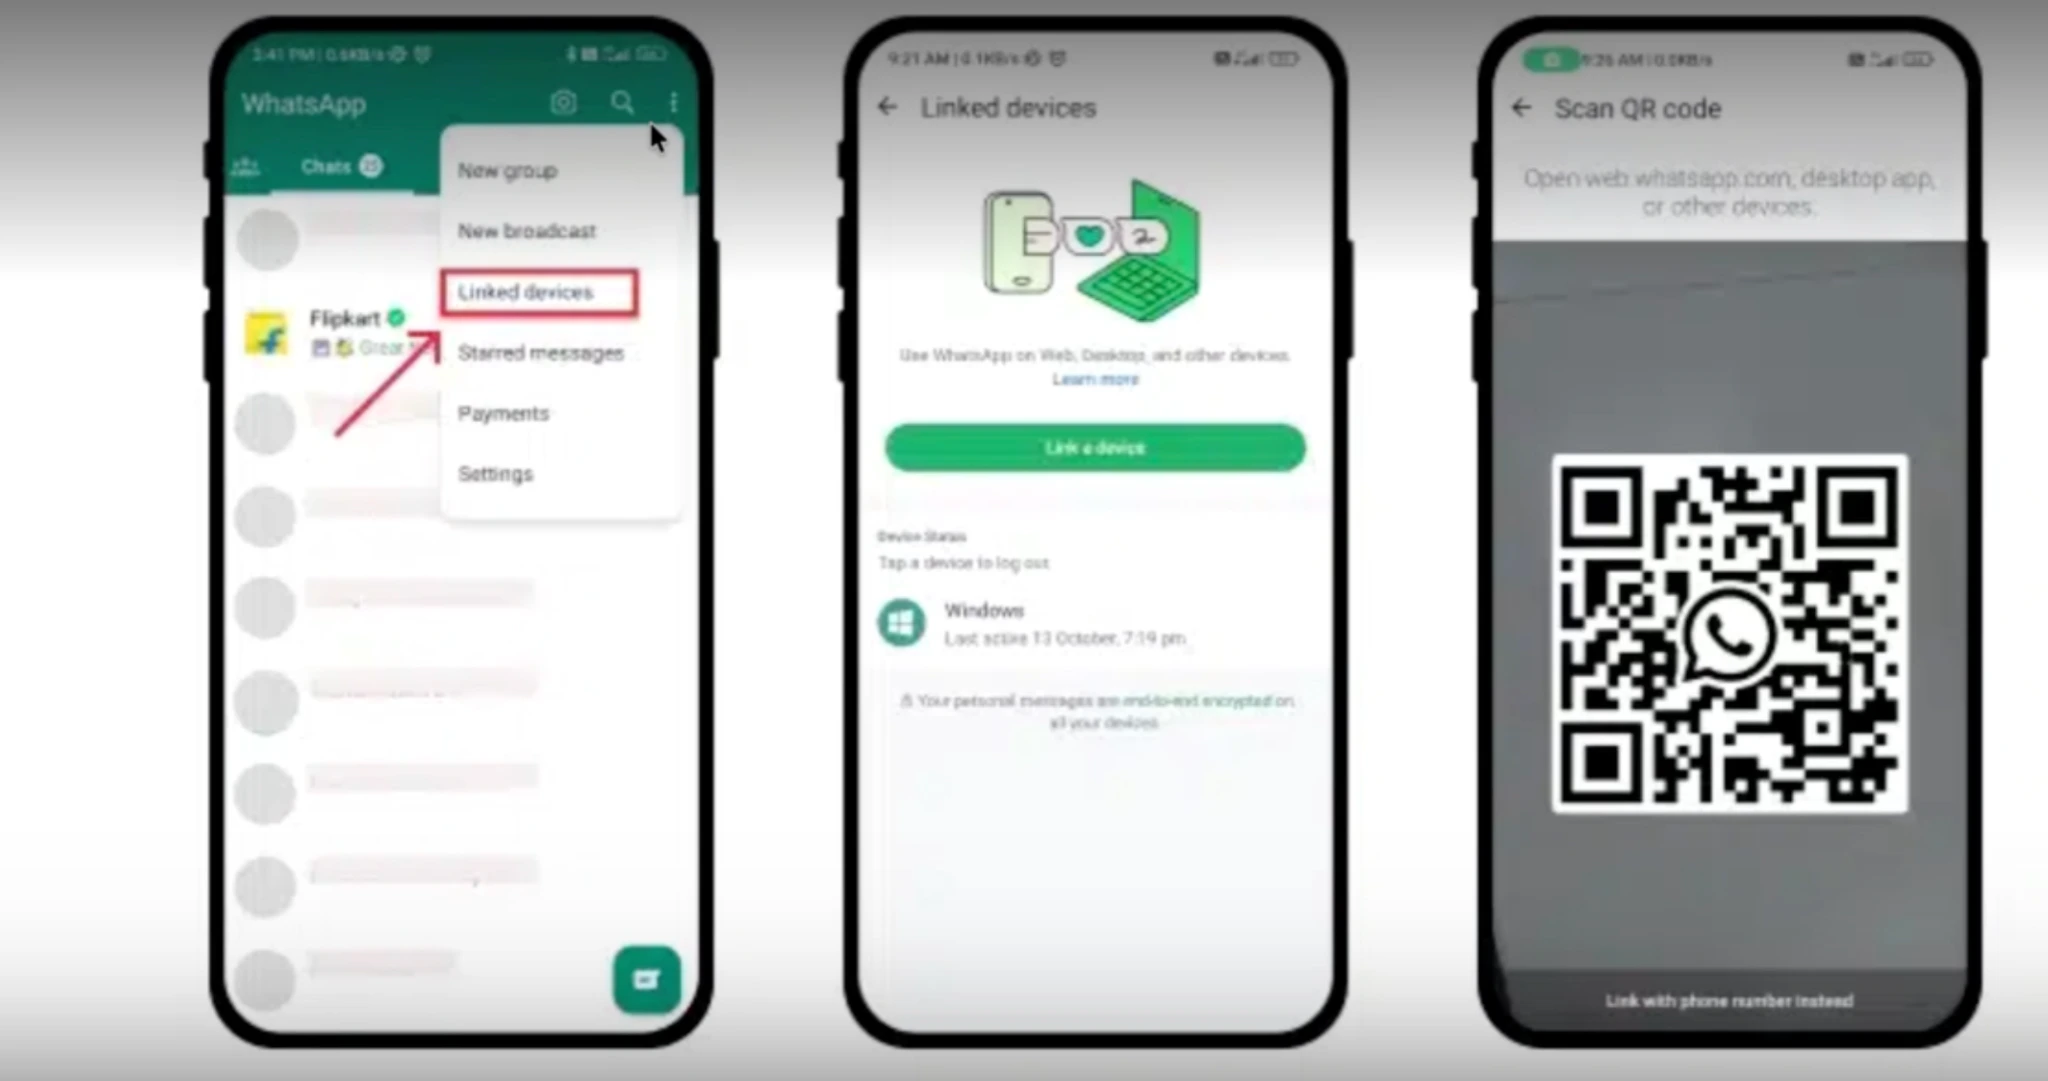
Now, take your phone and:- Open WhatsApp
- Tap the 3-dot menu (top-right corner)
- Select Linked Devices
- Tap Link a Device
- Scan the QR code displayed in your terminal
Step 7: Confirm connection
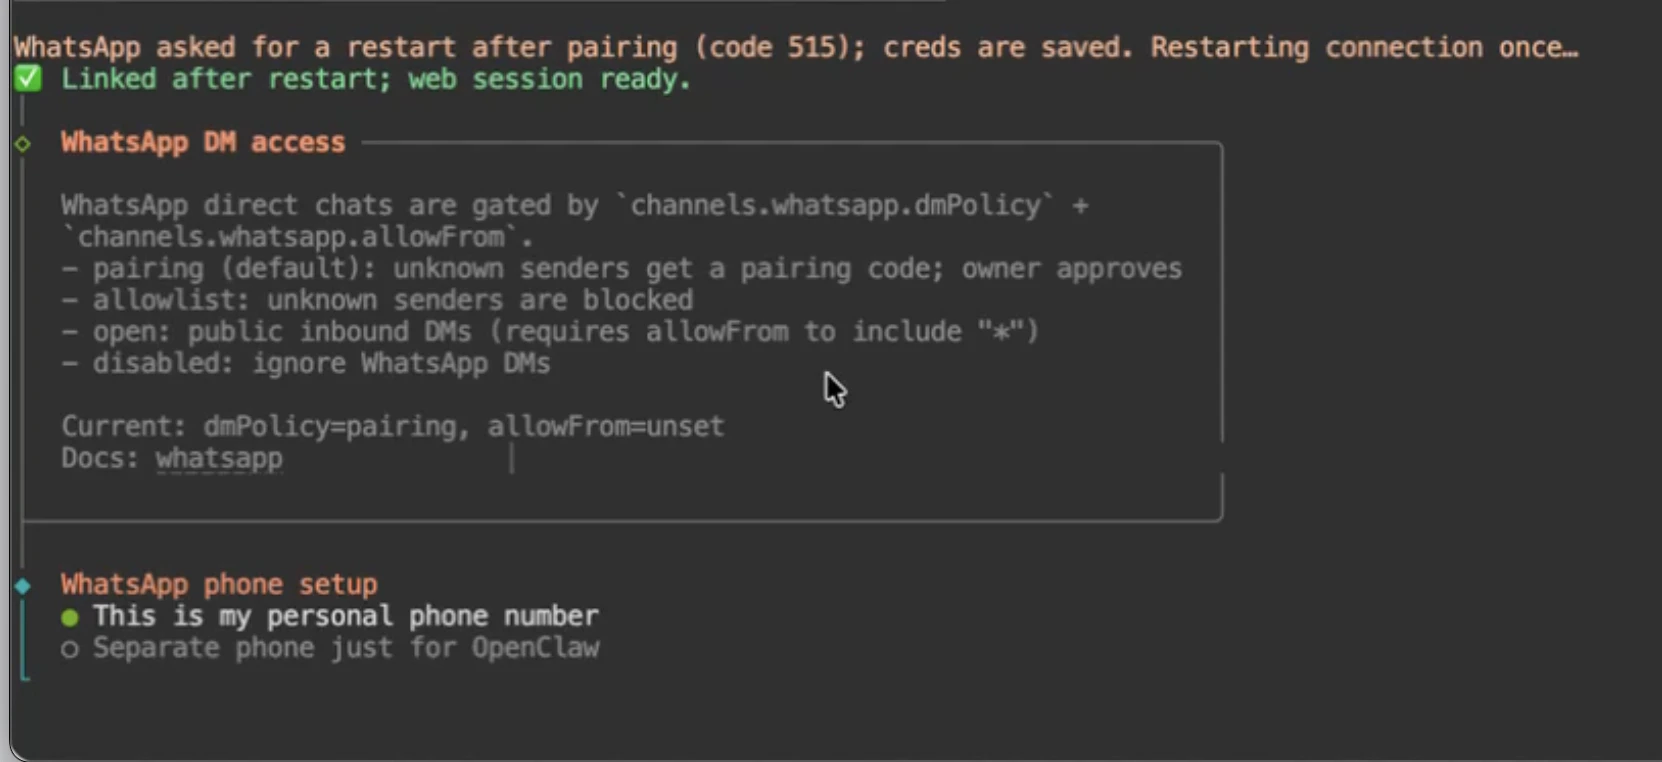
After scanning the QR code: 👉 Go back to the terminal.Step 8: Complete the WhatsApp phone setup
After successfully scanning the QR code and linking your account, you’ll complete the WhatsApp phone setup process. Follow the steps below carefully. When prompted in the terminal:- WhatsApp phone setup
This is my personal phone number
- You will then be asked to:
Enter your phone number
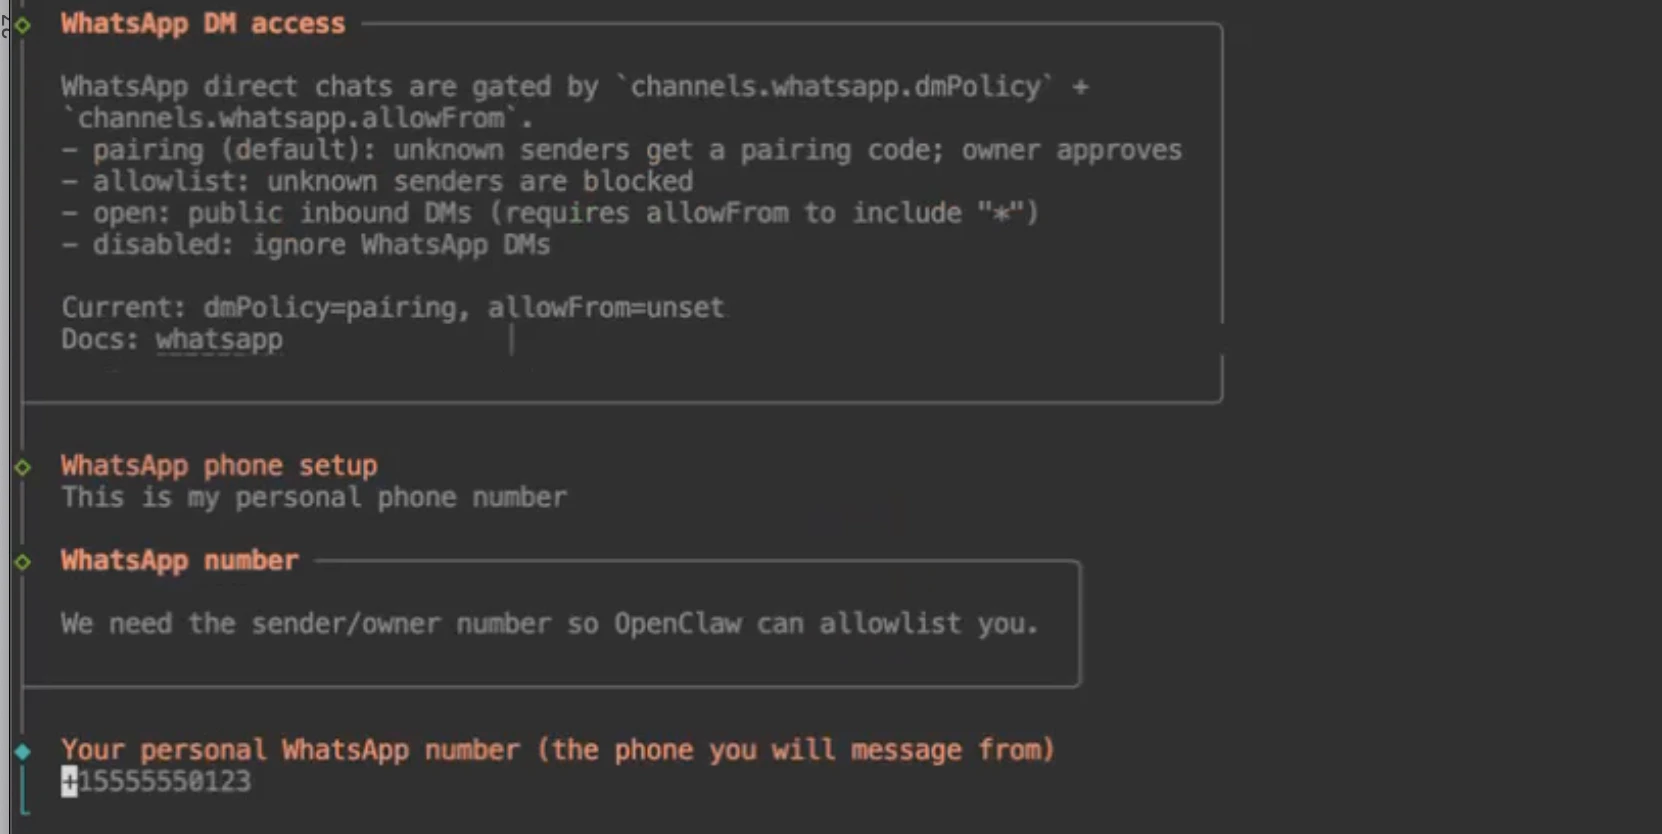
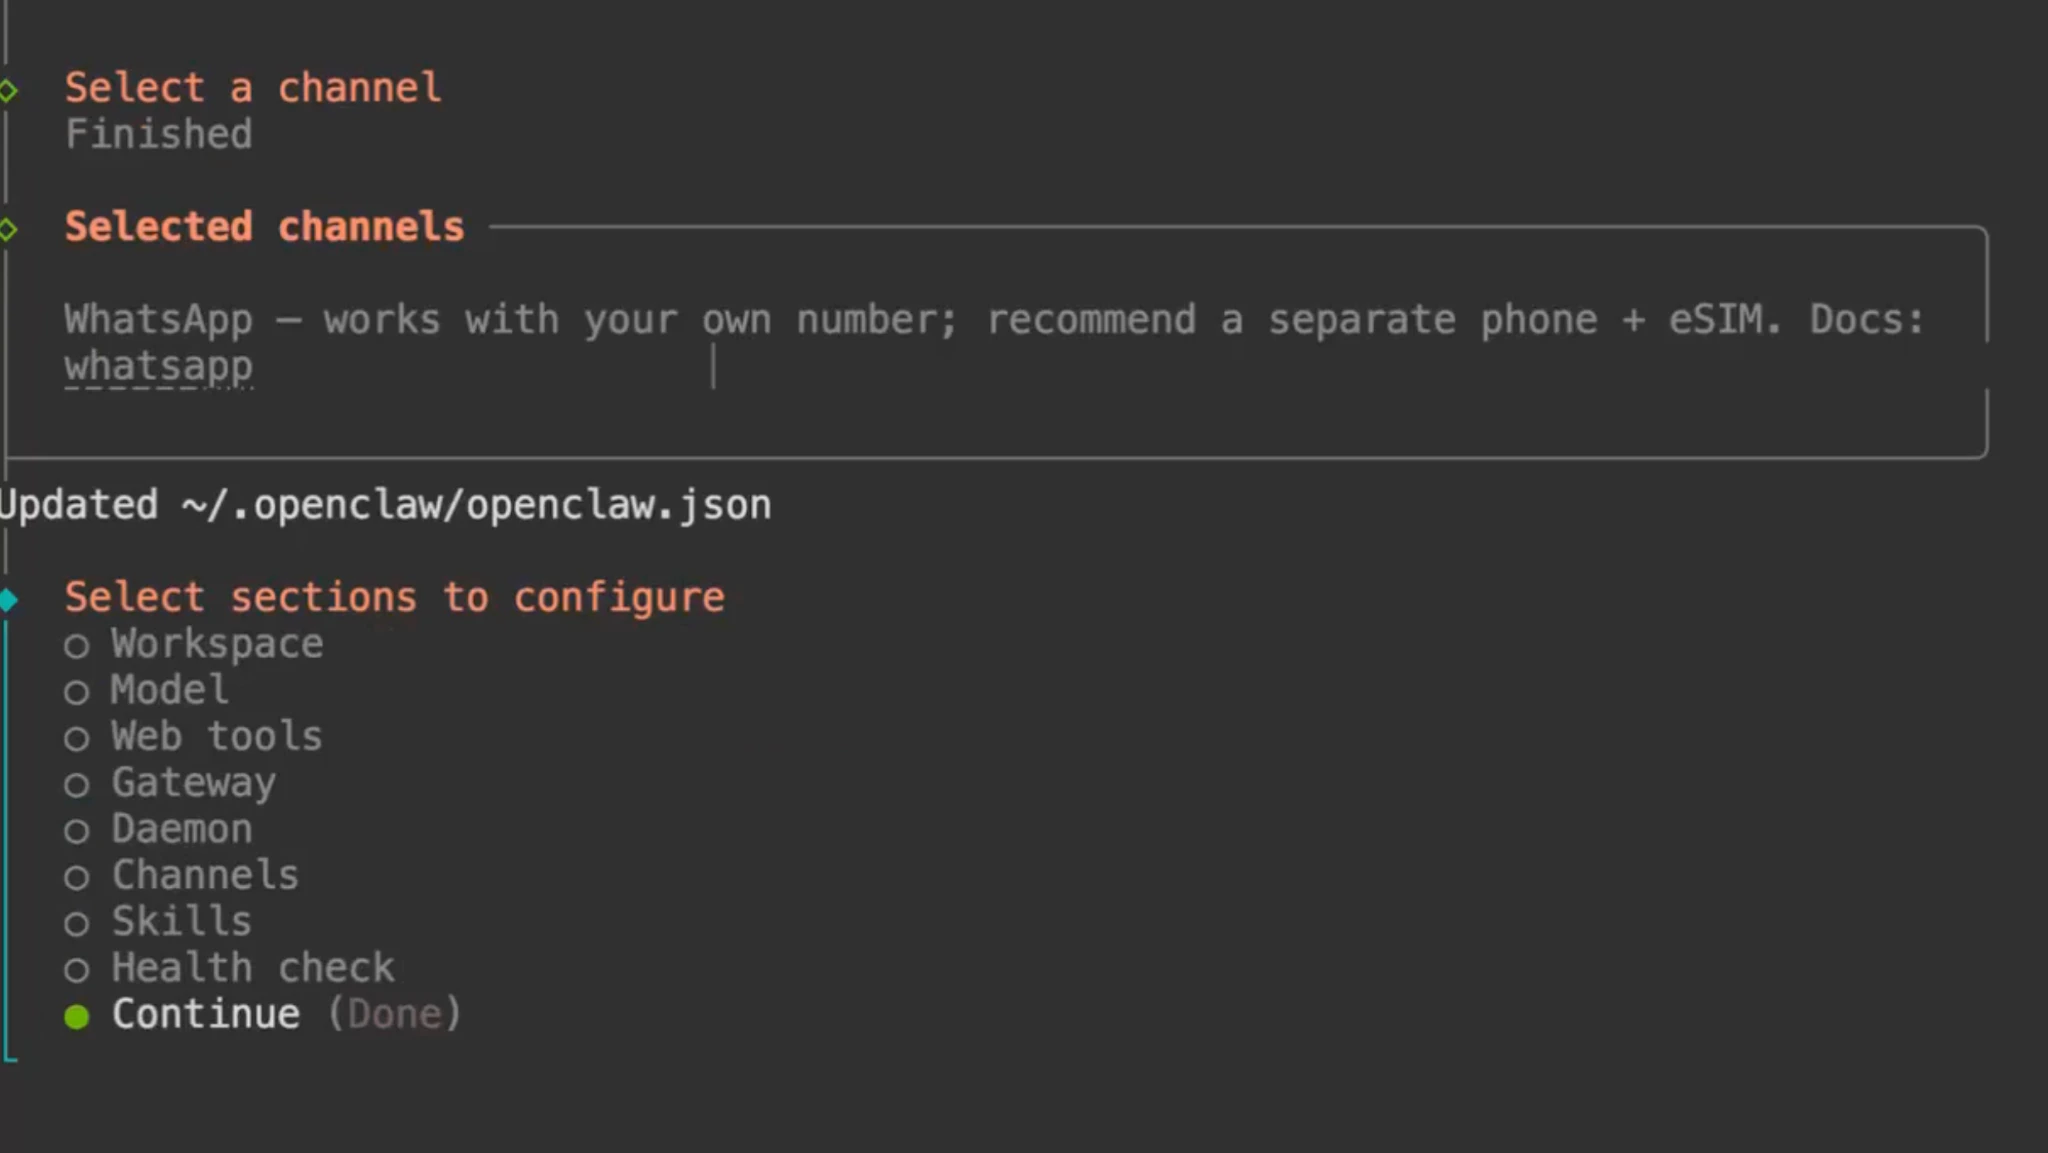
Step 9: Complete setup
After entering your number:- Navigate to
Finish - Then select
Continue
Step 10: Test your bot
Now open WhatsApp on your phone. In the search bar:- Search for your own number