> ## Documentation Index
> Fetch the complete documentation index at: https://www.agent37.com/docs/llms.txt
> Use this file to discover all available pages before exploring further.
# Whatsapp
> How to set up WhatsApp for OpenClaw
Integrating WhatsApp with your OpenClaw bot lets you automate conversations, provide instant support, and streamline communication with your users. This guide walks you through the setup flow in the [Agent 37 dashboard](https://www.agent37.com/dashboard).
Follow the steps below or watch the full video tutorial.
## Video walkthrough
## Step 1: Access the Agent37 dashboard
Start by visiting the Agent37 dashboard:
🔗 [https://www.agent37.com/dashboard](https://www.agent37.com/dashboard)
Log in to your account. If you don’t have one yet, create an account to get started.
## Step 2: Create a new instance
Once logged in:
1. Navigate to your dashboard.
2. Click on **Create Instance**.
3. Wait for the instance to be successfully created.
Your instance is the environment where your OpenClaw bot will run.
## Step 3: Open the terminal
After your instance is ready:
1. Click on your newly created instance.
2. Select **Terminal** from the available options.
This will open a command-line interface where you can configure your OpenClaw bot.
## Step 4: Run the configuration command
Inside the terminal, execute the following command:
```text theme={null}
openclaw configure
```
This command will initiate the configuration process for your OpenClaw bot, including the WhatsApp setup.
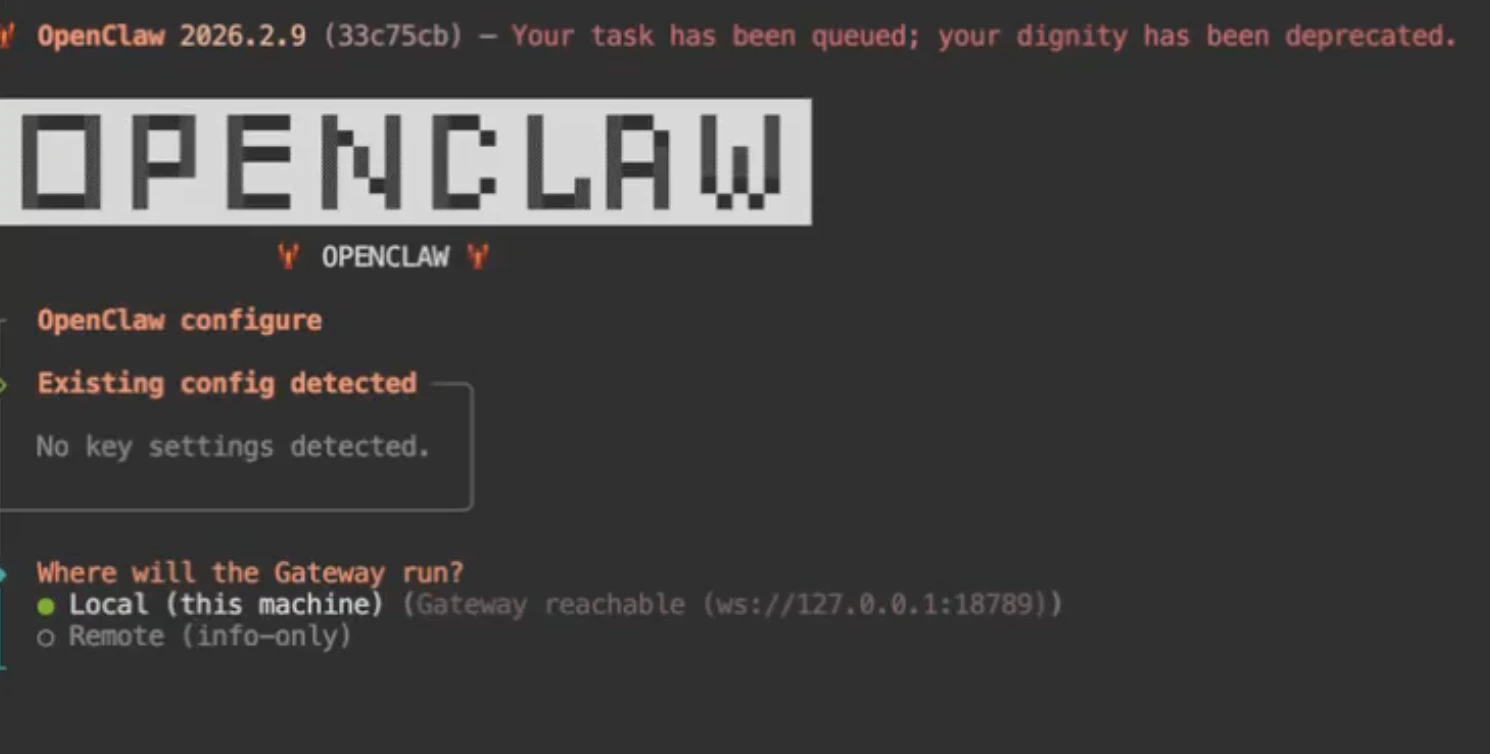
## Step 5: Configure the gateway
When prompted:
* **Where will the gateway run?**
👉 Select `Local`
This ensures the gateway runs on your current instance.
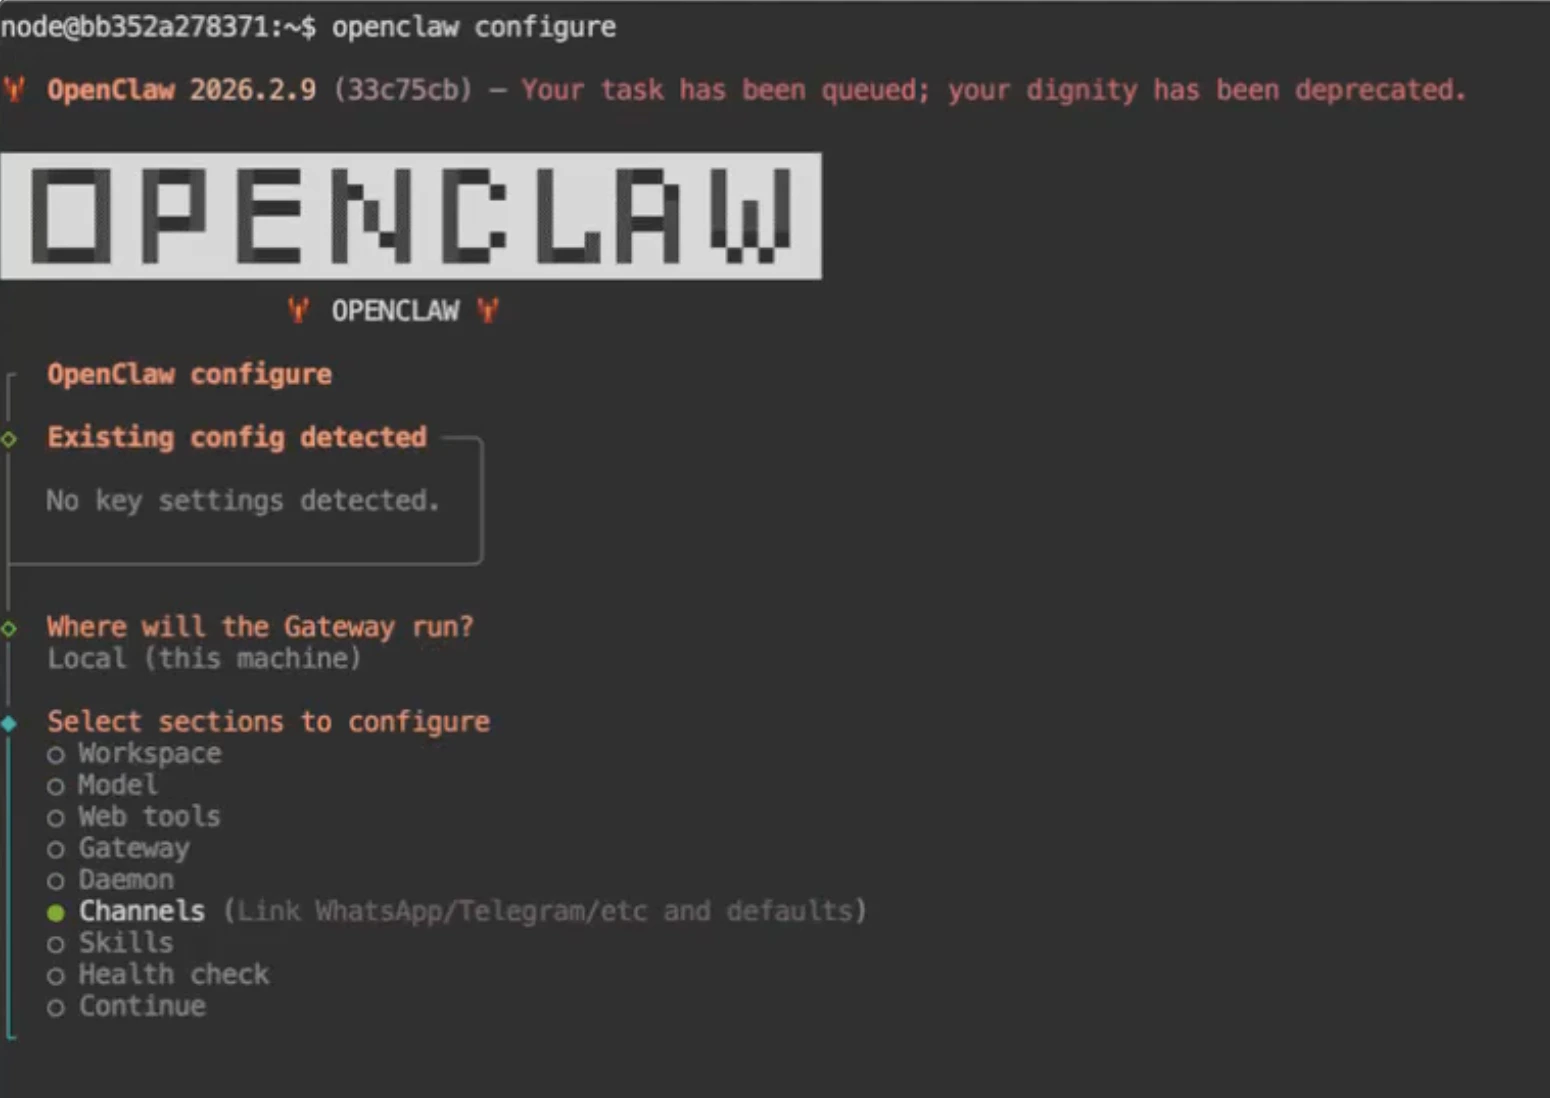
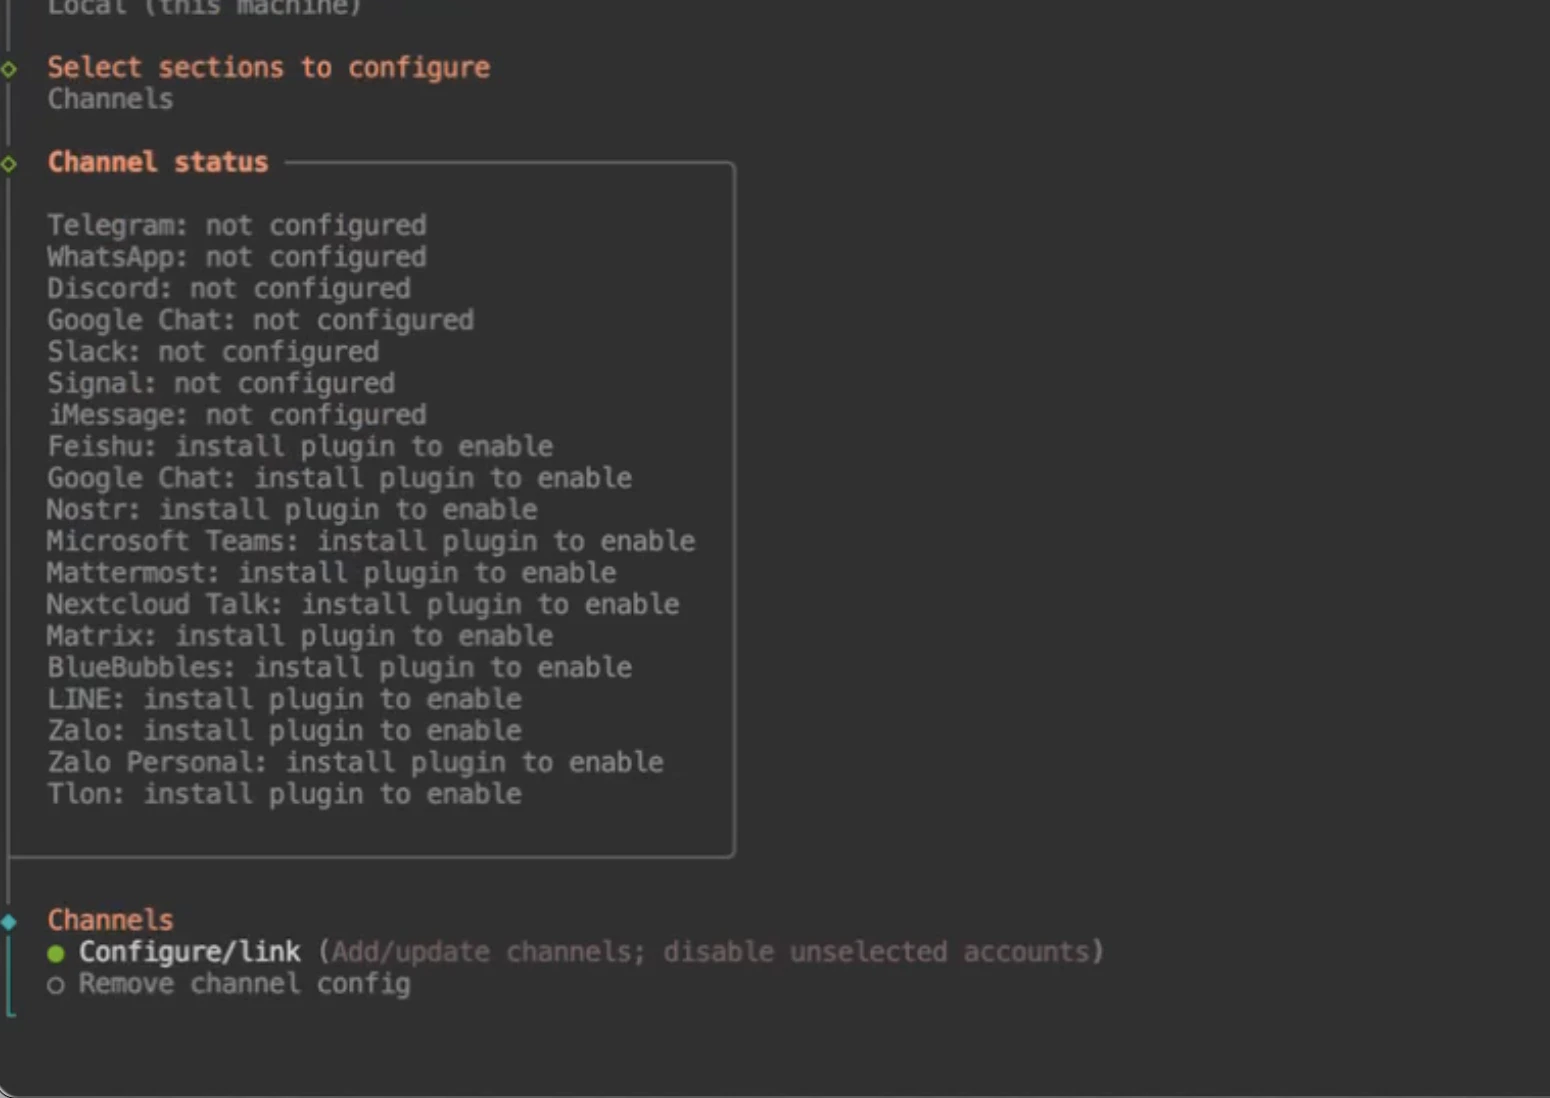
You’ll see:
* **Select Section to Configure?**
👉 Select `Channel`
👉 Choose `Configure / Link`
Use the **arrow keys** on your keyboard
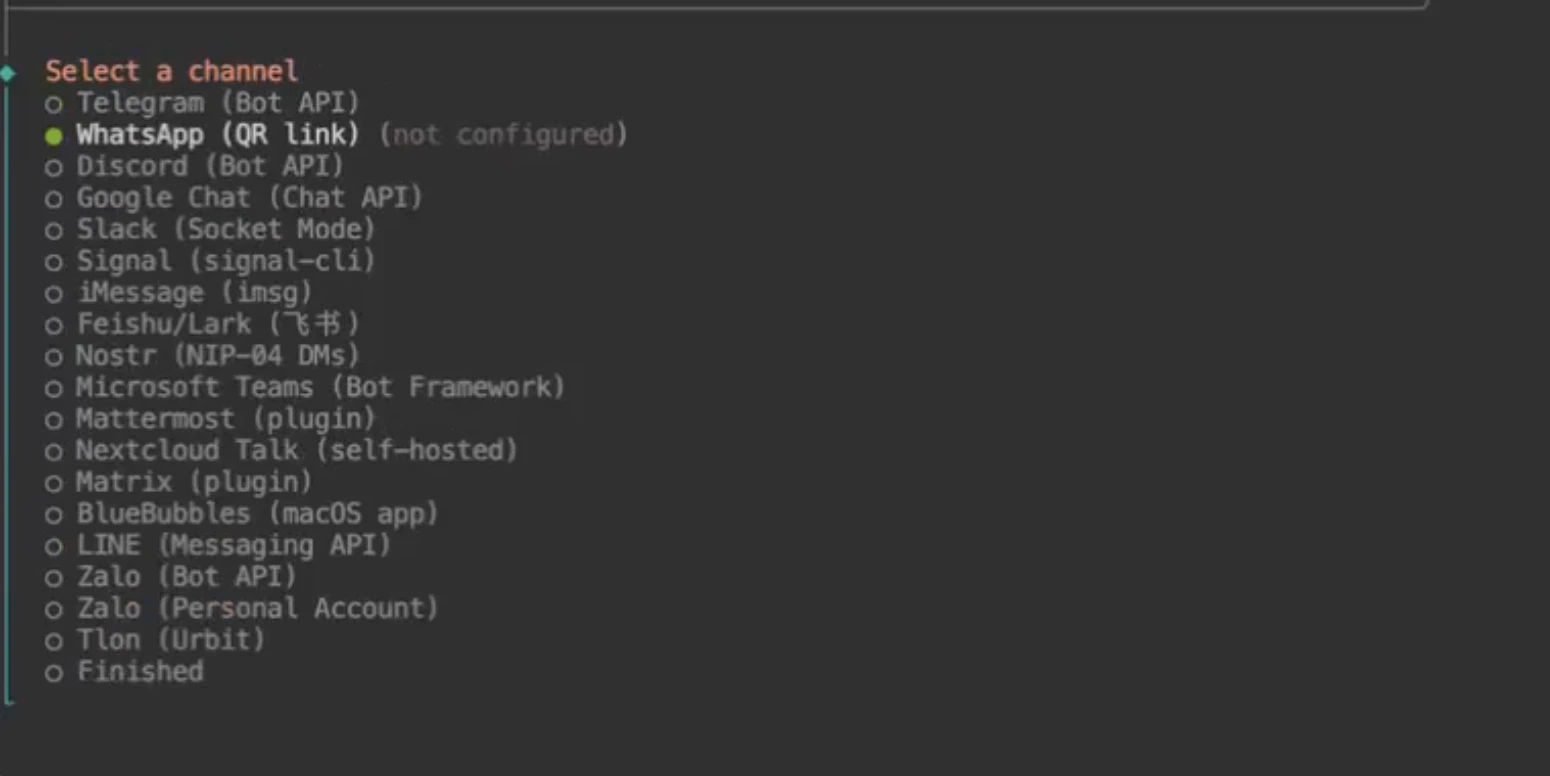
You will now see:
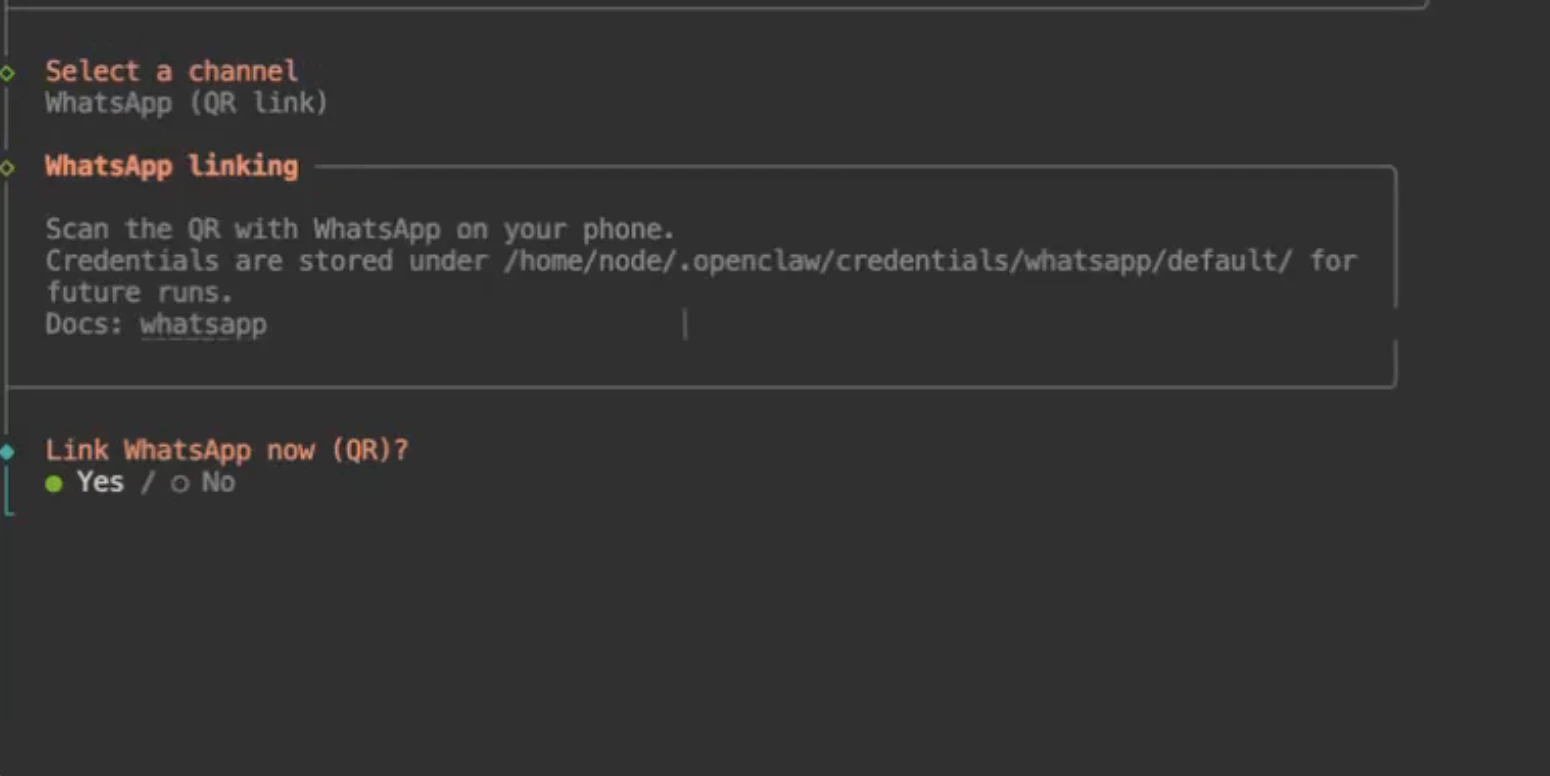
* **Select Channel**
👉 Choose `WhatsApp`
Next prompt:
* **Link WhatsApp Now?**
> 👉 Select `Yes`
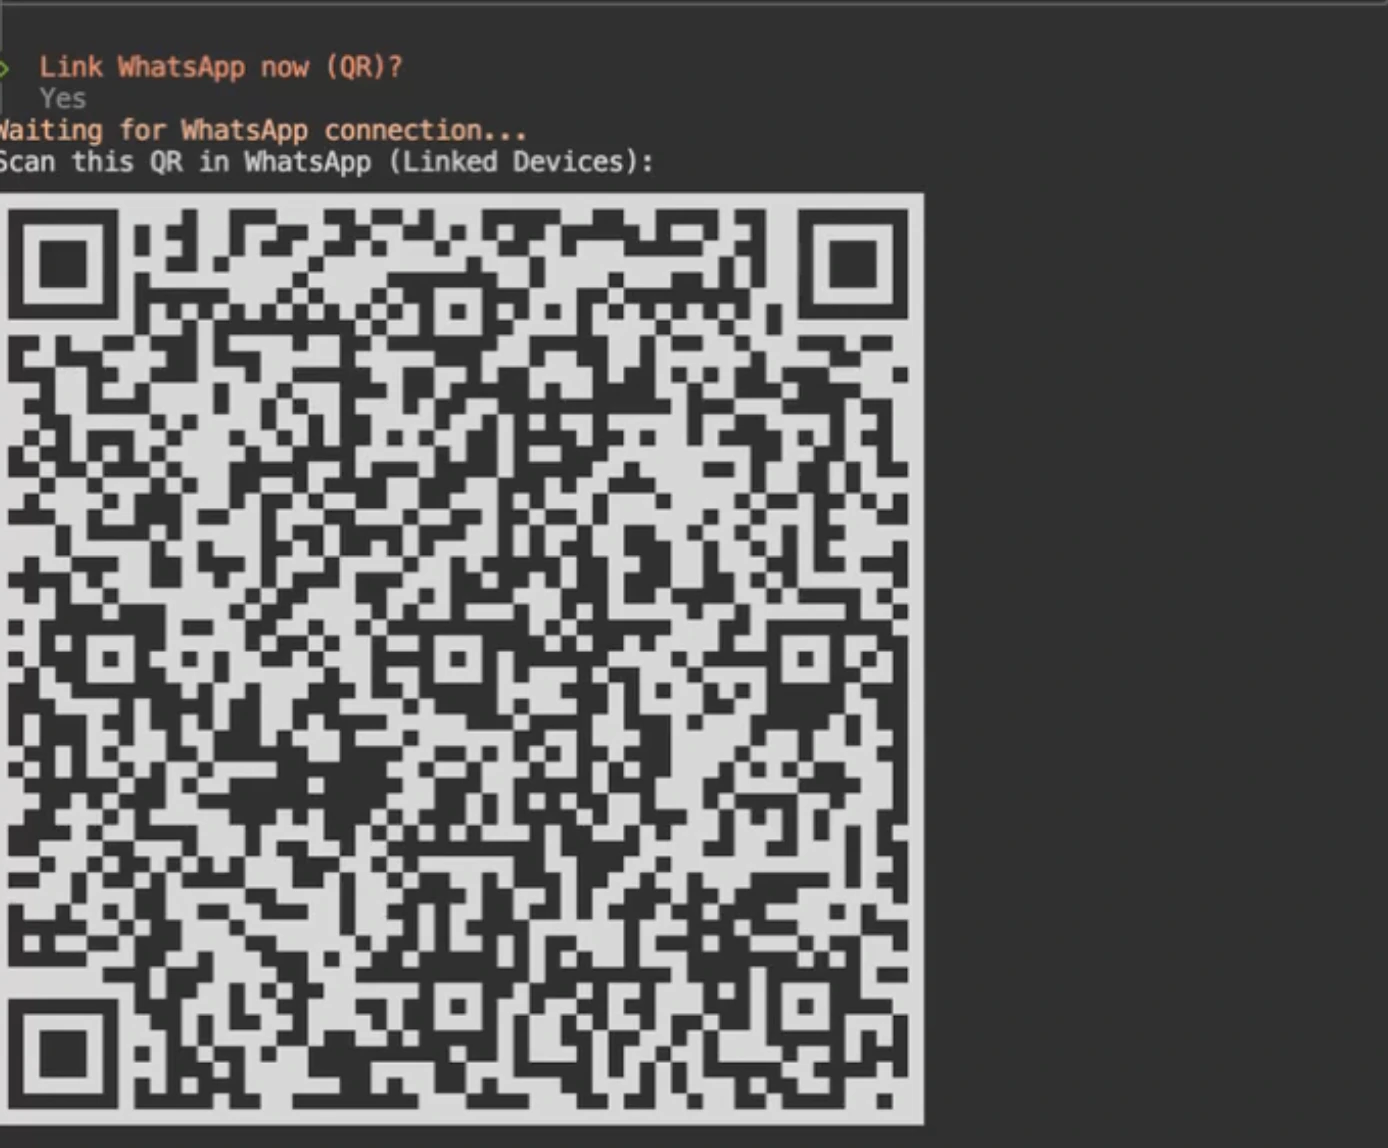
The system will now generate a **QR Code** in the terminal.
## Step 6: Scan the QR code
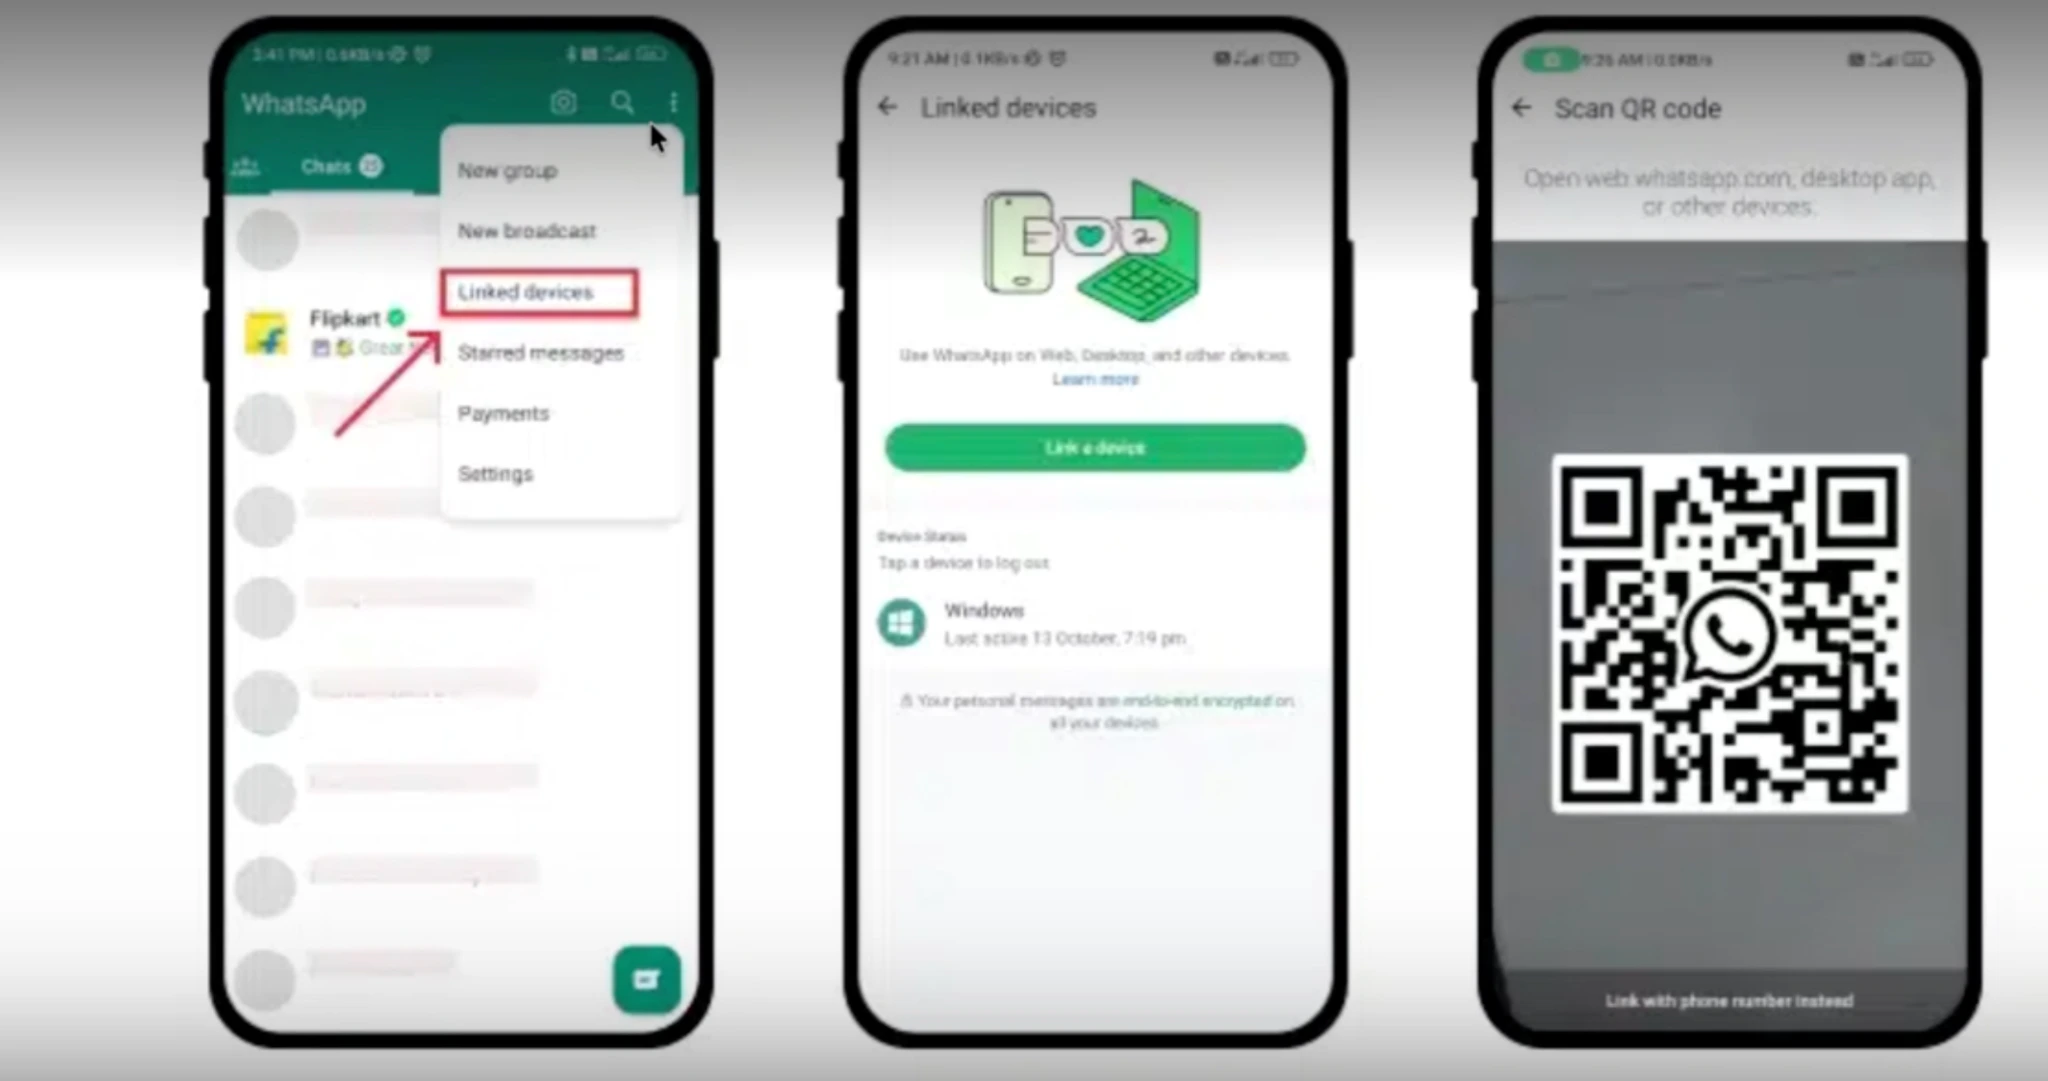
Now, take your phone and:
1. Open **WhatsApp**
2. Tap the **3-dot menu** (top-right corner)
3. Select **Linked Devices**
4. Tap **Link a Device**
5. Scan the QR code displayed in your terminal
Once scanned successfully, your WhatsApp account will connect to the OpenClaw gateway.
## Step 7: Confirm connection
After scanning the QR code:
👉 Go back to the terminal.
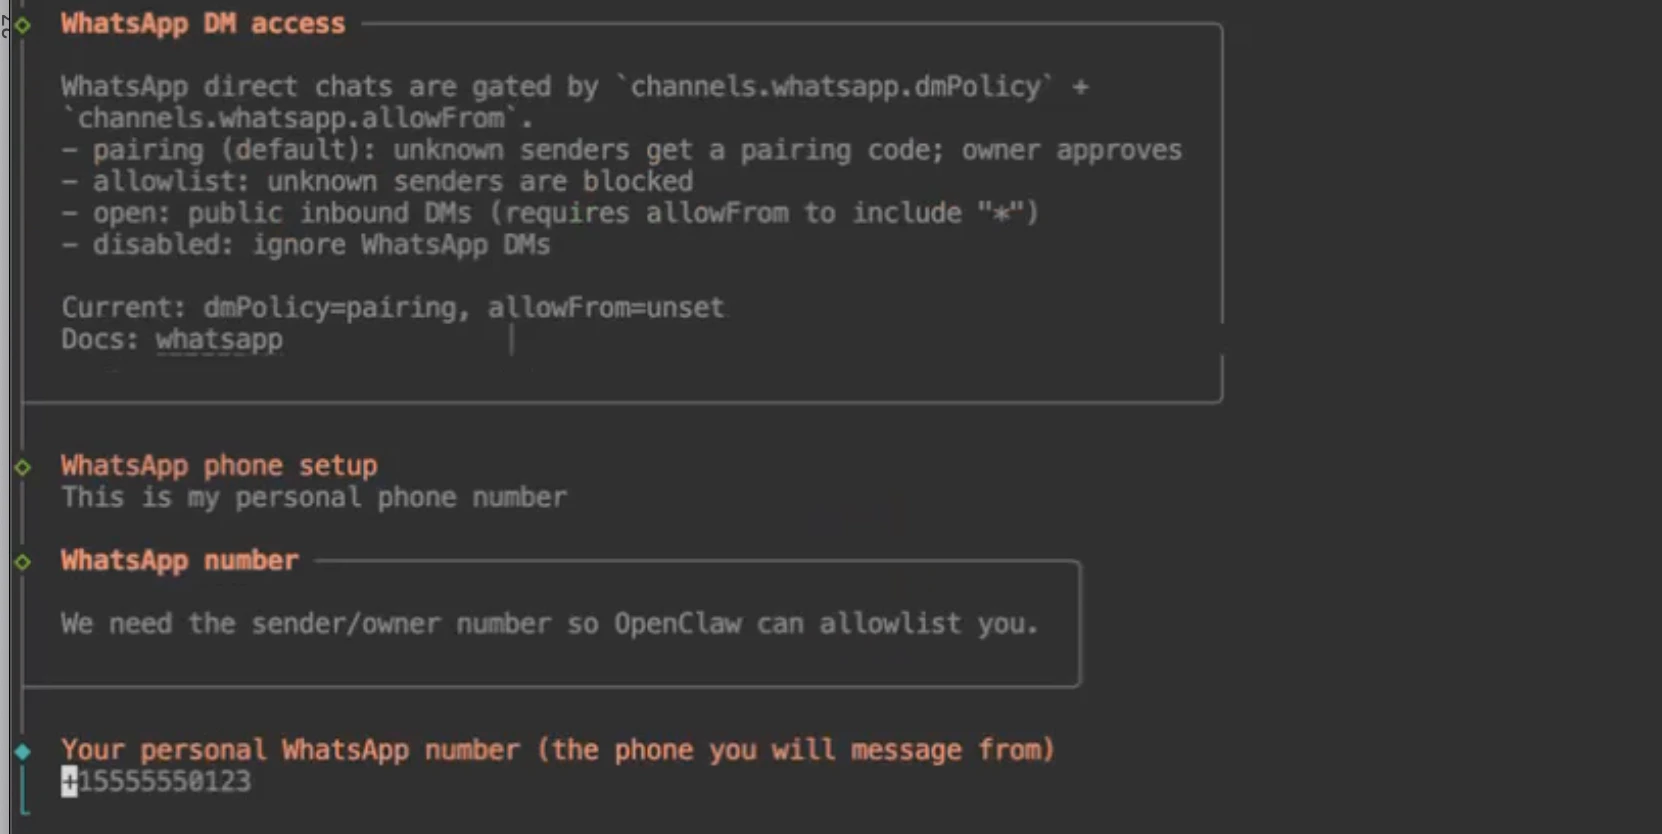
## Step 8: Complete the WhatsApp phone setup
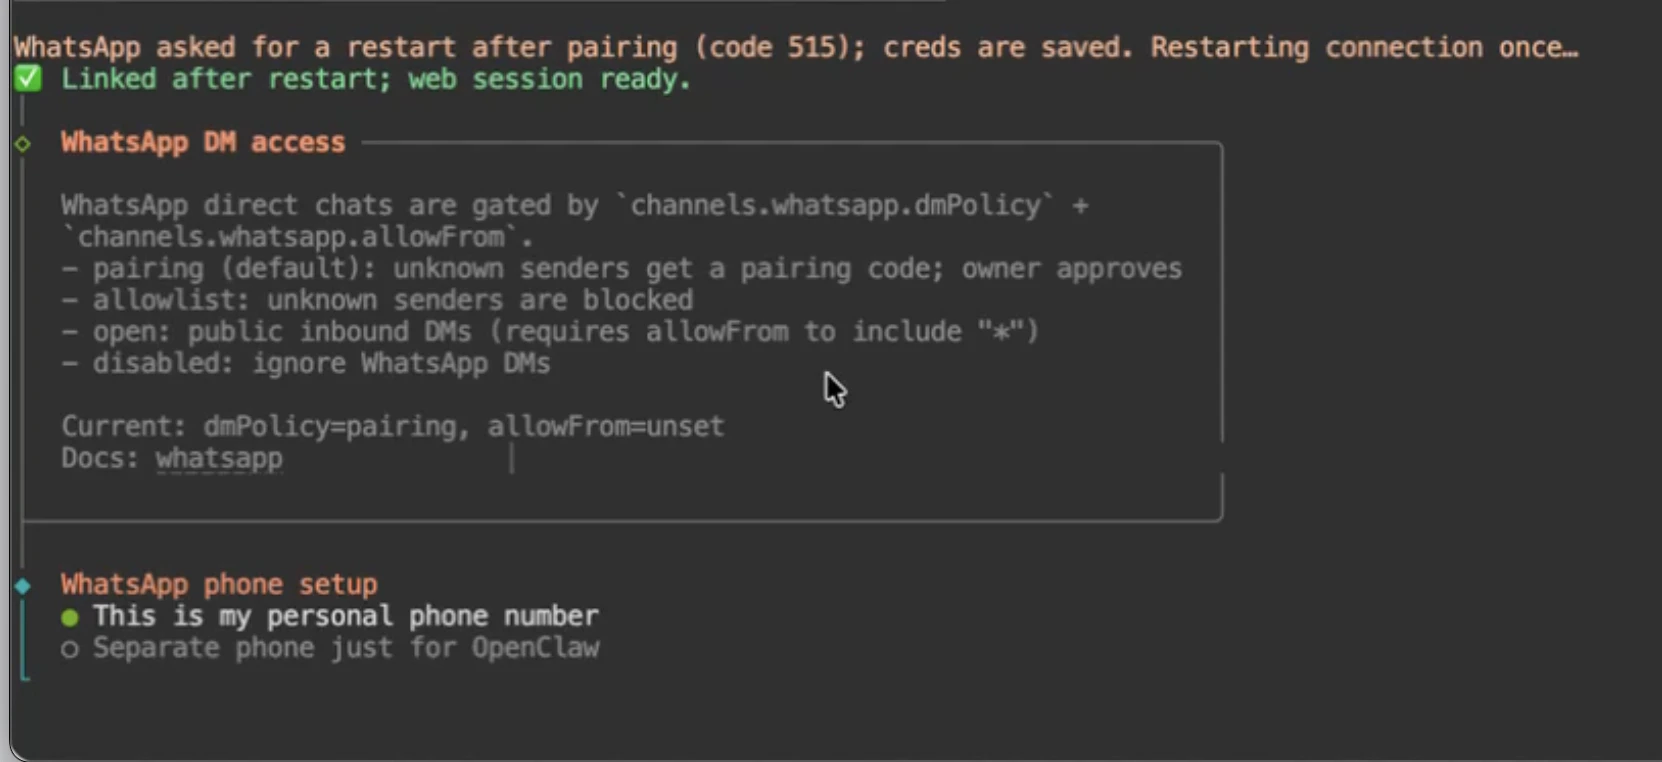
After successfully scanning the QR code and linking your account, you’ll complete the WhatsApp phone setup process. Follow the steps below carefully.
When prompted in the terminal:
* **WhatsApp phone setup**
👉 Select `This is my personal phone number`
* **You will then be asked to:**
👉 `Enter your phone number`
Make sure you enter the correct number linked to your WhatsApp account.
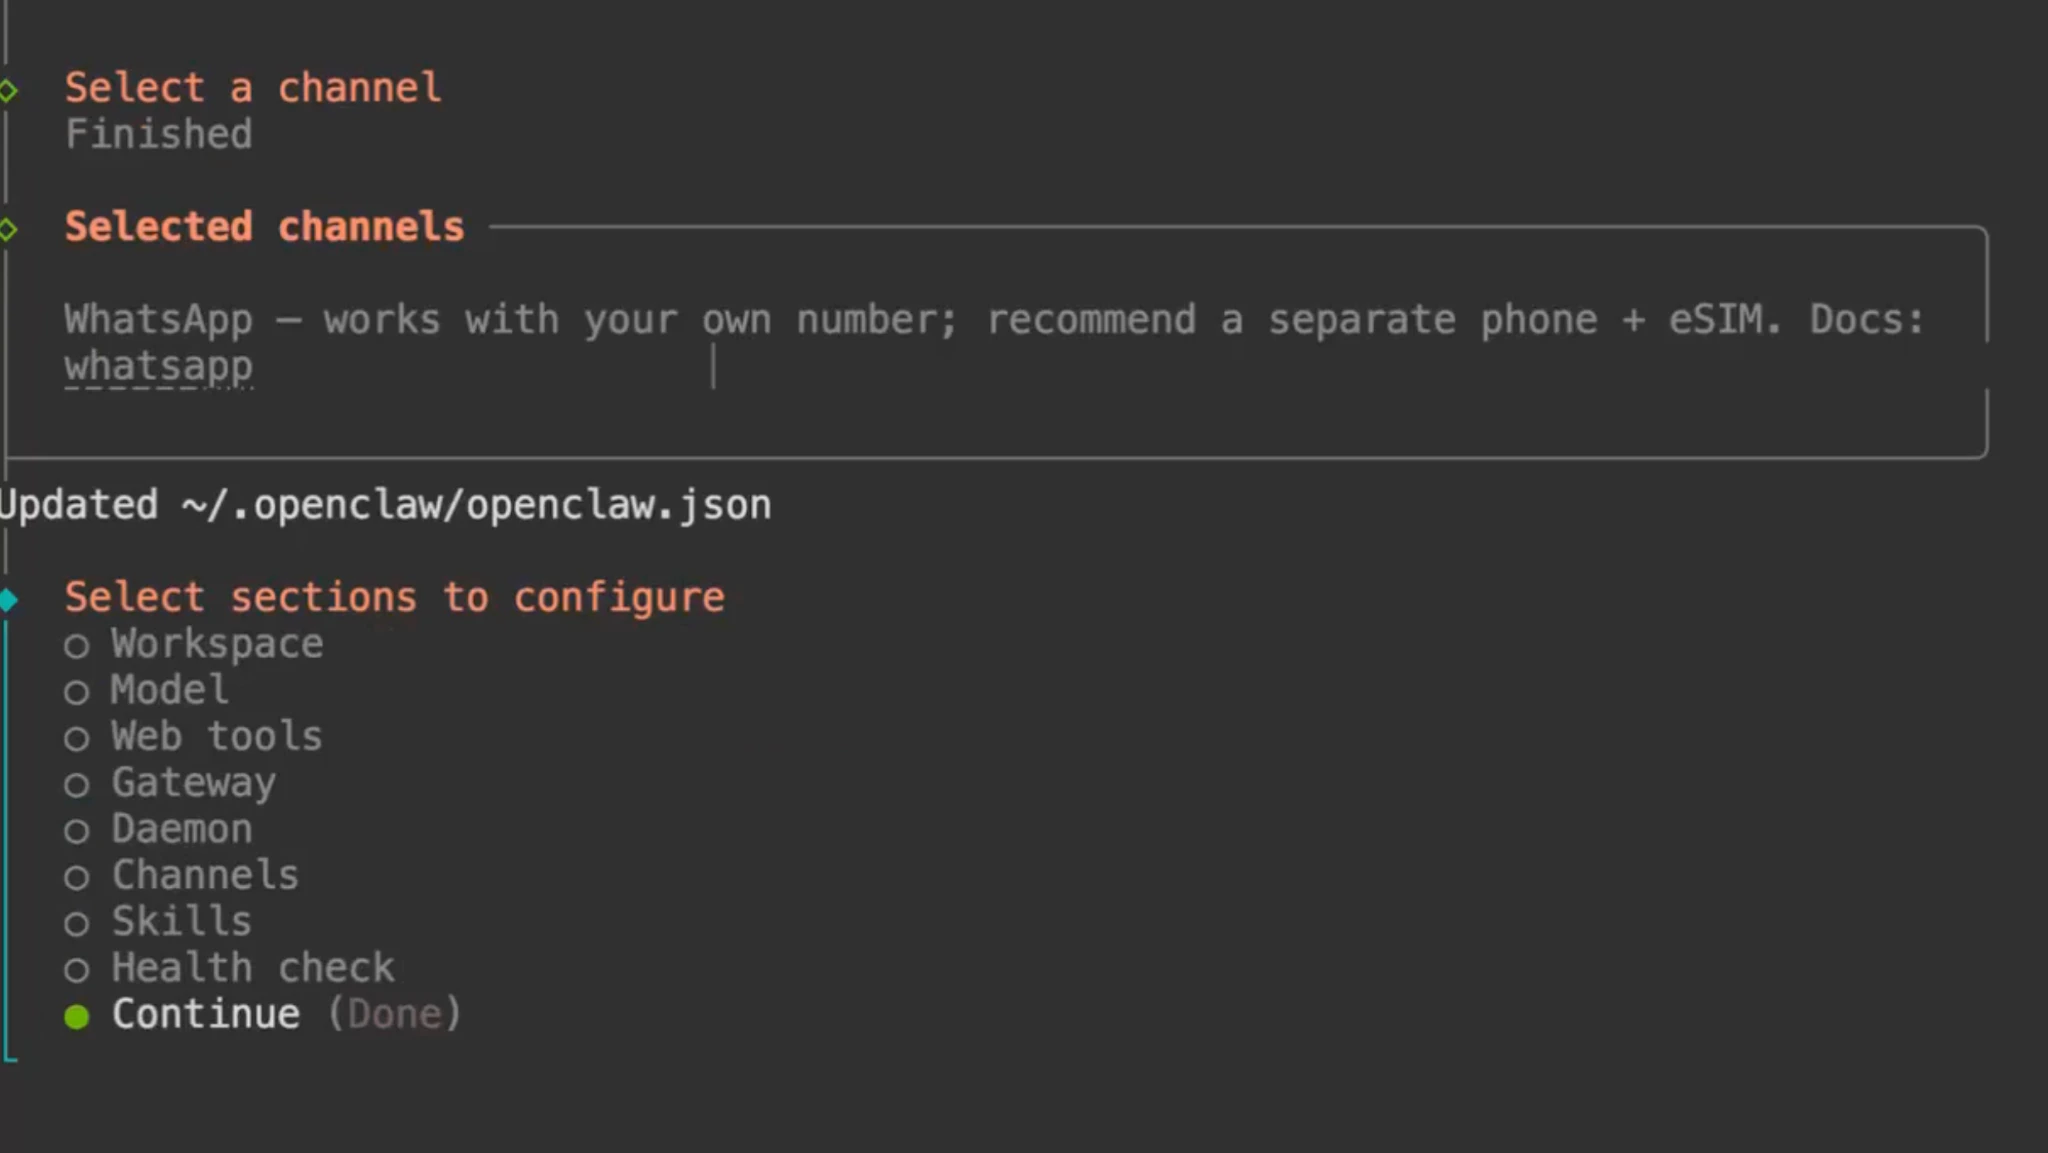
## Step 9: Complete setup
After entering your number:
1. Navigate to `Finish`
2. Then select `Continue`
This completes the WhatsApp channel configuration.
## Step 10: Test your bot
Now open **WhatsApp** on your phone.
In the search bar:
* Search for **your own number**
Start a chat and send a message.
If everything is configured correctly, your **OpenClaw bot will respond automatically** 🎉
 This ensures the gateway runs on your current instance.
You’ll see:
* **Select Section to Configure?**
👉 Select `Channel`
👉 Choose `Configure / Link`
Use the **arrow keys** on your keyboard
This ensures the gateway runs on your current instance.
You’ll see:
* **Select Section to Configure?**
👉 Select `Channel`
👉 Choose `Configure / Link`
Use the **arrow keys** on your keyboard
 You will now see:
* **Select Channel**
👉 Choose `WhatsApp`
You will now see:
* **Select Channel**
👉 Choose `WhatsApp`
 Next prompt:
* **Link WhatsApp Now?**
> 👉 Select `Yes`
Next prompt:
* **Link WhatsApp Now?**
> 👉 Select `Yes`
 The system will now generate a **QR Code** in the terminal.
 ## Step 6: Scan the QR code
Now, take your phone and:
1. Open **WhatsApp**
2. Tap the **3-dot menu** (top-right corner)
3. Select **Linked Devices**
4. Tap **Link a Device**
5. Scan the QR code displayed in your terminal
Once scanned successfully, your WhatsApp account will connect to the OpenClaw gateway.
## Step 6: Scan the QR code
Now, take your phone and:
1. Open **WhatsApp**
2. Tap the **3-dot menu** (top-right corner)
3. Select **Linked Devices**
4. Tap **Link a Device**
5. Scan the QR code displayed in your terminal
Once scanned successfully, your WhatsApp account will connect to the OpenClaw gateway.
 ## Step 7: Confirm connection
After scanning the QR code:
👉 Go back to the terminal.
## Step 8: Complete the WhatsApp phone setup
After successfully scanning the QR code and linking your account, you’ll complete the WhatsApp phone setup process. Follow the steps below carefully.
When prompted in the terminal:
* **WhatsApp phone setup**
👉 Select `This is my personal phone number`
## Step 7: Confirm connection
After scanning the QR code:
👉 Go back to the terminal.
## Step 8: Complete the WhatsApp phone setup
After successfully scanning the QR code and linking your account, you’ll complete the WhatsApp phone setup process. Follow the steps below carefully.
When prompted in the terminal:
* **WhatsApp phone setup**
👉 Select `This is my personal phone number`
 * **You will then be asked to:**
👉 `Enter your phone number`
* **You will then be asked to:**
👉 `Enter your phone number`
 Make sure you enter the correct number linked to your WhatsApp account.
## Step 9: Complete setup
After entering your number:
1. Navigate to `Finish`
2. Then select `Continue`
Make sure you enter the correct number linked to your WhatsApp account.
## Step 9: Complete setup
After entering your number:
1. Navigate to `Finish`
2. Then select `Continue`
 This completes the WhatsApp channel configuration.
## Step 10: Test your bot
Now open **WhatsApp** on your phone.
In the search bar:
* Search for **your own number**
Start a chat and send a message.
If everything is configured correctly, your **OpenClaw bot will respond automatically** 🎉
This completes the WhatsApp channel configuration.
## Step 10: Test your bot
Now open **WhatsApp** on your phone.
In the search bar:
* Search for **your own number**
Start a chat and send a message.
If everything is configured correctly, your **OpenClaw bot will respond automatically** 🎉